eCommerce, Tips & Tricks, WordPress
How To Import And Export WooCommerce Products With Images

By importing and exporting WooCommerce products with images, you can easily move your store or add new products to different stores.
Why Import and Export Products from WooCommerce?
For a variety of reasons, a lot of users need to import and export WooCommerce products.
- You might want to transfer merchandise between different WooCommerce stores.
- You might want to launch an online store using the same WooCommerce products on a new WordPress website.
- If you wish to migrate your website to a new server, you’ll need a more effective method of product delivery.
- You might desire a quicker approach to add your products to the several stores you run.
- and more
Now typically, if you’re migrating your website to a new server, you can just make a copy of your entire website and set it up on your new host.
In contrast, if all you want to do is move products, this tutorial will show you how to correctly export and import WooCommerce products together with their associated photos and other product data.
We’ll demonstrate two approaches, and you can pick the one that best suits your needs.
Method 1. Importing and Exporting WooCommerce Products without a Plugin
WooCommerce has built-in functionality that makes it simple to import and export products with photos without the need for further plugins.
You must first go to your WordPress admin area’s Products » All Products page. There are two buttons to “Import” or “Export” products at the top.
Let’s first examine how the export feature functions.
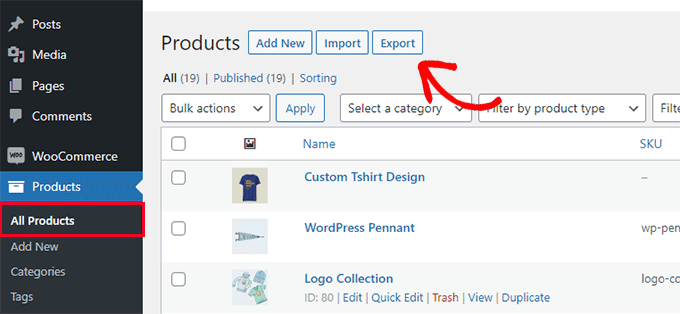
To proceed, only click the “Export” button at the top.
You can select which data you wish to export from a number of options on the following screen.
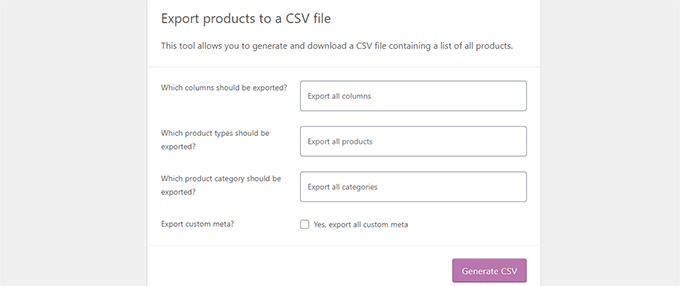
For instance, you can select to export only a subset of the product data’s columns. Additionally, you have the option to export only certain product categories or types of products.
You can leave these boxes unchecked to export every product, even those with photographs and other data.
You may choose to enable “Export custom meta.” It is better to check it if you are unclear so that you have the information.
Simply select “Generate CSV” to move further.
The CSV file will now be created by WooCommerce and downloaded to your computer.
CSV files
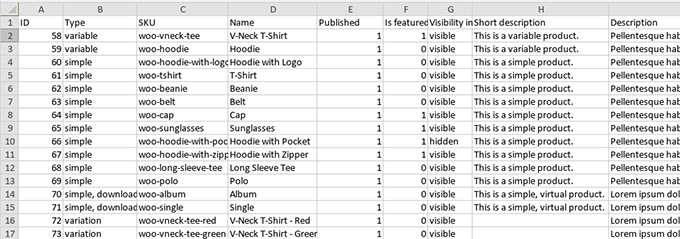
CSV stands for “Comma Separated Values,” a file format for plain text that uses commas to denote the separation of different columns or fields of data.
Any spreadsheet programme, including Microsoft Excel or Google Sheets, can be used to open it. This is how it would appear:
Adding Products from WooCommerce without a Plugin
Easily click the Import button at the top of the Products » All Products page.
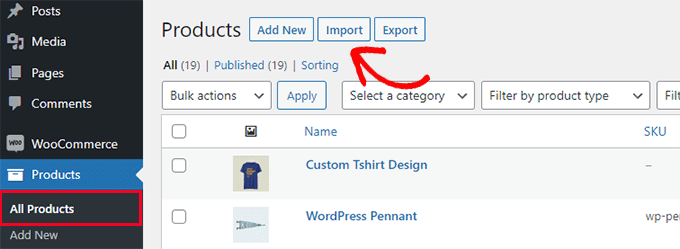
Instead of buttons at the top, you will see buttons in the middle of the page if your WooCommerce store is empty.
Click the “Start Import” button to begin the import.
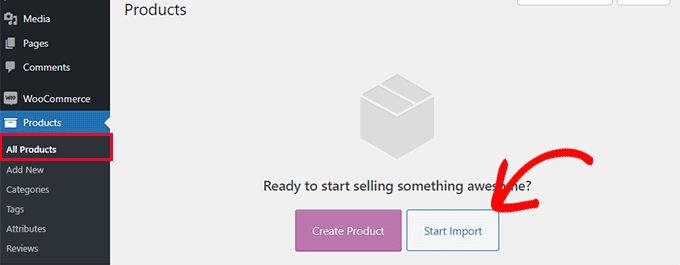
By doing this, the import wizard will open.
To begin, you must first click the “Choose File” option and choose the WooCommerce export CSV file that you already downloaded.
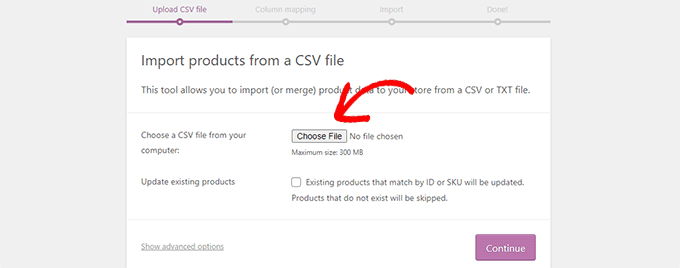
The CSV file can be uploaded by selecting the proceed button.
The format of your CSV file will now be checked by WooCommerce. It will then ask you to map that data to the data for current WooCommerce products.
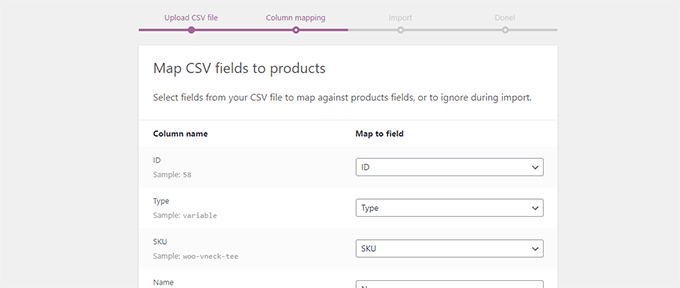
Most WooCommerce stores may operate with these default settings.
Review the data nonetheless, and if a column is missing, pick the appropriate field from the drop-down menu adjacent to it, if one is offered.
Make careful to go down to the attributes columns and match fields, especially if you are utilising variations attribute for products.
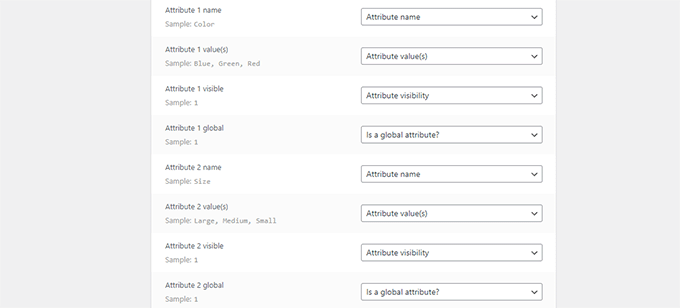
By doing this, you can make sure that the fields in your CSV file correspond to the appropriate ones in WooCommerce.
To start, click the “Run” Importer button.
Data from the CSV file will now begin to be imported into WooCommerce using their CSV importer. Any photos that are related to your products will also be downloaded.
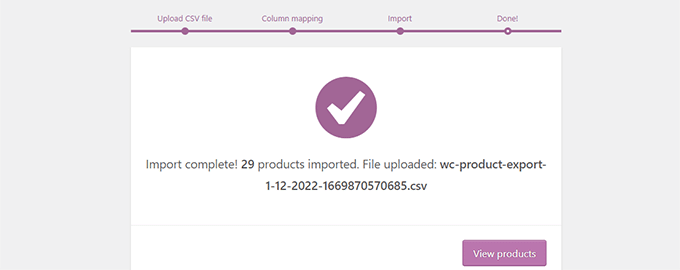
Once finished, you can view the imported goods by going to the Products > All Products page.
Visit the pages for your store and products to make sure everything is operating as it should.
Method 2: Use a plugin to import and export WooCommerce products
For this technique, we’ll import and export WooCommerce products utilising a plugin.
This approach has the advantage of providing more customizable options and allowing you to export and import product reviews.
Additionally, you may import and export WooCommerce products in groups, which is useful if you have a big store with lots of items and pictures.
Using a Plugin to Export Products from WooCommerce
Installing and activating the Product Import Export for WooCommerce plugin is the first step.
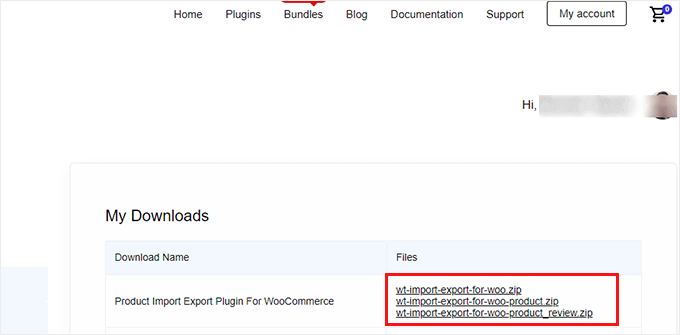
The plugin is available as three different add-ons. They must all be downloaded and set up.
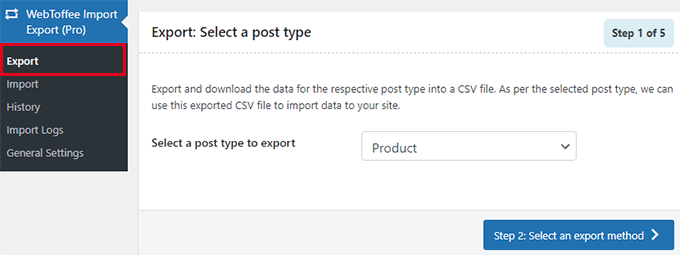
After activation, go to the Webtoffee Import Export (Pro) > Export page and choose ‘Product’ as the post type to export.
An export method must be chosen on the next screen.
All of your goods are automatically chosen for export using the Quick Export technique by default.
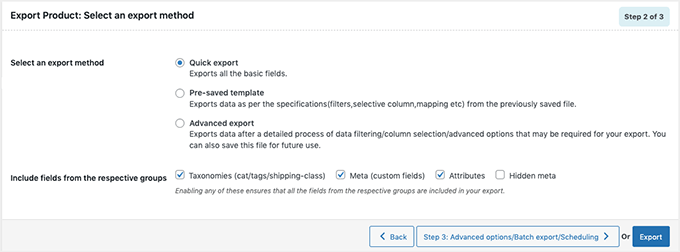
You can also select the “Advanced Export” option, which enables you to filter products by category, tag, and status.
Additionally, you may manually exclude specific products.
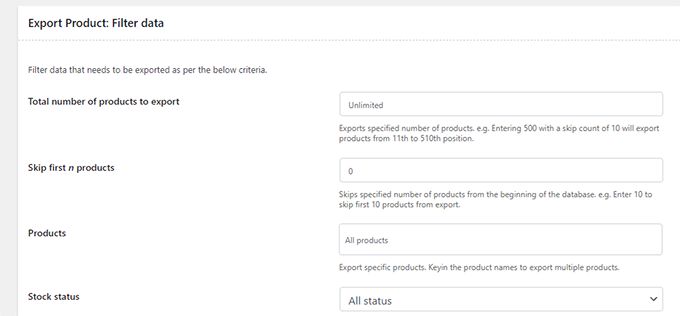
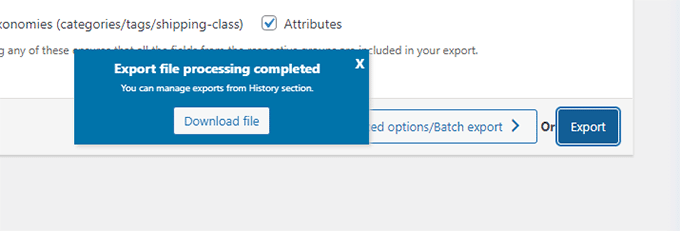
To continue, click the Export button, and the plugin will begin gathering your product data.
When everything is done, a popup to download the export file to your computer will appear.
Using a Plugin to Import Products from WooCommerce
Once your export file is prepared, you may use it to import products into a different WooCommerce store.
The Product Import Export for WooCommerce plugin is simple to instal and activate on the store where the products need to be imported.
Then, pick “Product” as the post type you wish to import on the Webtoffee Import Export (Pro) > Import page.
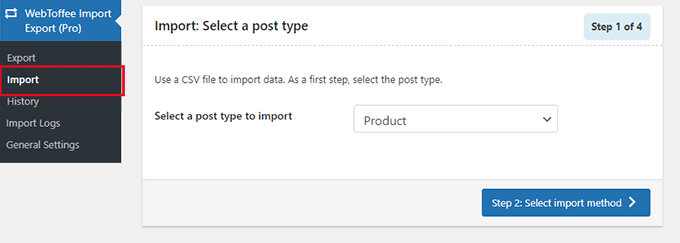
From the menu, select “Step 2: Select import method.”
The exported file you downloaded earlier must now be uploaded to your computer using an import method that you have chosen.
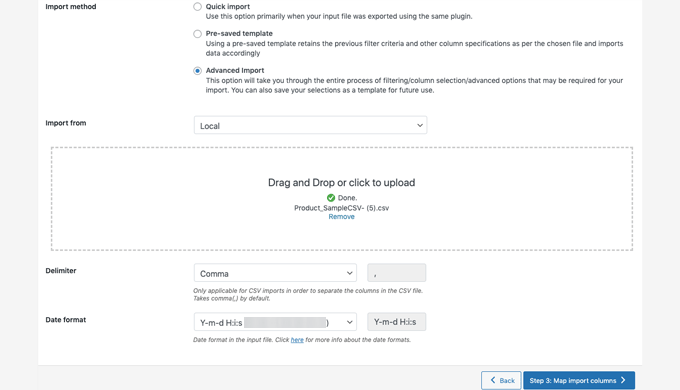
To proceed, select the ‘Step 3: Map and Import Columns’ button.
A list of fields and the associated fields from your import file are displayed on the next screen. If a field is blank, you can select a corresponding field from the following column.
Make sure to select the Attributes tab to match attribute fields if you are using product variations such as sizes and colors.
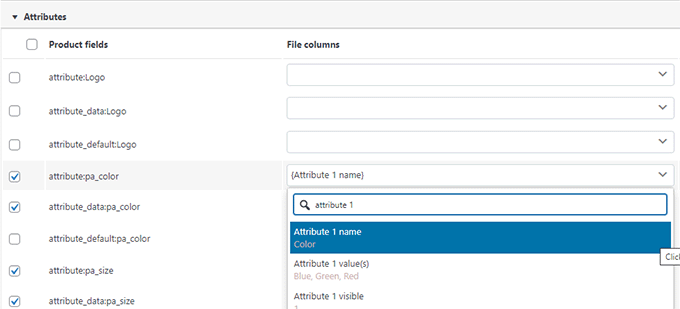
Use the default settings, though, if you aren’t using any items with variations or unique qualities.
To proceed, select “Step 4: Advanced Options / Batch Import” from the menu.
The last screen will display advanced options. You can decide how to match items by ID or SKU, what to do if a product is already on the market, and more.
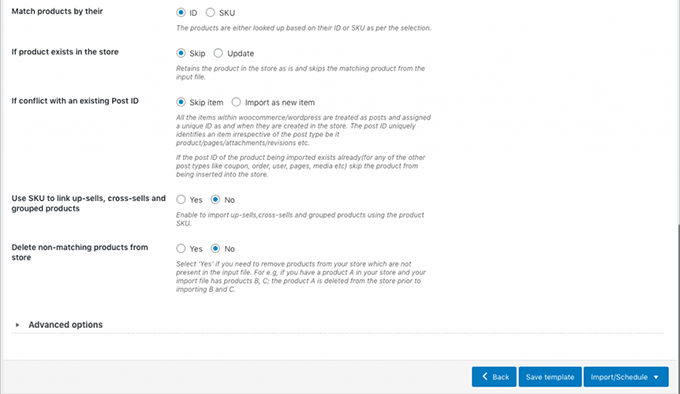
Use the default settings if you are importing products into an empty WooCommere store.
To start the process of importing the product, click the “Import” button.
The import’s progress will be displayed on the screen. When you’re done, click “View Products” to see if everything imported successfully.
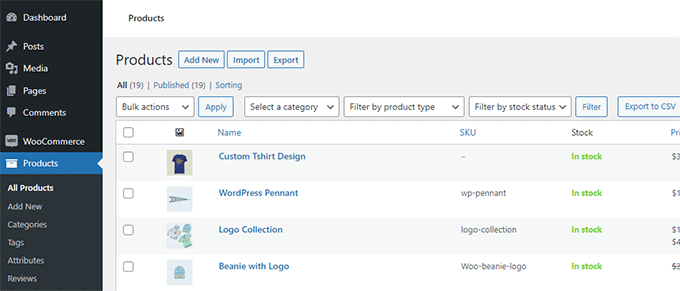
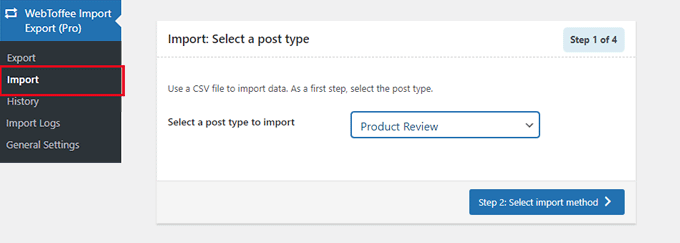
Additionally, you may import and export product reviews using the plugin.
Simply select the “Product Reviews” post type on the import or export page if you also wish to import or export product reviews.
Automated Improvements for Your WooCommerce Store
Use Uncanny Automator for workflow automation if you frequently perform manual tasks for your WooCommerce store and want to save time.
With a simple no-code visual builder, Uncanny Automator enables you to link more than 100 plugins and applications. Without creating any code, you may use it to automate workflows for tasks you already perform.
Over 20,000 websites currently use the free version, which is available for testing.
In addition to workflow automation, we suggest using FunnelKit Automation if you’re searching for a marketing automation platform for WooCommerce. Without incurring large charges, it will assist you in increasing sales and converting more customers.