How To Create A Web Directory In WordPress?

Creating a web directory in WordPress can be a great way to organize and showcase information in your niche. Online directories have become a highly popular internet business model in recent years, and for good reason. They provide a space for individuals and companies to list their products, services, and contact details, which can be browsed by potential customers. What’s more, these directories can also allow visitors to submit their own content, such as reviews, photos, or comments, thereby building a community around your website.
The beauty of creating an online directory is that it enables you to profit from content donated by visitors. This means you don’t have to create all the content yourself; instead, you can curate and organize user-generated content to create a valuable resource for your audience. In return, visitors can enjoy exposure and recognition for their contributions, which can be a significant motivator for participation.
Creating an online directory in WordPress is a relatively straightforward process. From installing and activating an appropriate theme, to setting up custom fields and taxonomies, there are a range of steps you can take to create a compelling and professional directory on your website.
With the right tools and techniques, you can turn your website into a valuable resource for businesses, individuals, and communities. Whether you’re looking to monetize user-generated content or simply provide a platform for others to share their work, an online directory can be a powerful addition to your website. So why not get started today?
Create A Web Directory In WordPressy Using Business Directory Plugin
This strategy is the simplest and is suggested by the majority of people. The Business Directory plugin will be used. This WordPress directory plugin includes everything you’ll need to set up a basic business directory.
There is also a free version of Business Director plugin available, but to access the more complex features, you must upgrade.
You must first install and activate the plugin.
Go to Directories » Settings after activating the plugin. A popup will now appear asking for your permission to create a new page.
This page is essential for the Business Directory plugin to function properly, so go ahead and click on ‘Build required pages for me.’

The plugin will now add a new page to the site called ‘Business Directory.’
By default, this page includes all of the options users need to browse your listings and submit their own.

To begin, navigate to the Directory » Settings and check the plugin’s settings.
There are several sections here:
- Listing
- Payment
- Appearance.
We recommend picking each tab and then reviewing the settings to see if any adjustments are required.
For instance, in ‘Listings,’ you can specify how many listings the plugin displays on each page.
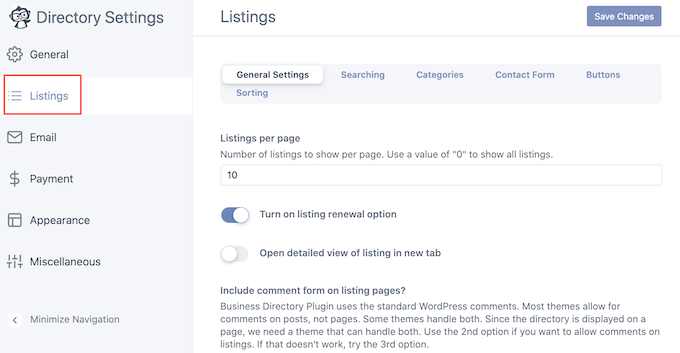
When you’re finished, remember to click the ‘Save Changes’ button to save your settings.
Visitors to the Business Directory see a standard form. Go to Directory > Directory Content to customize that form.
‘Form Fields’ can be found in the left-hand menu.
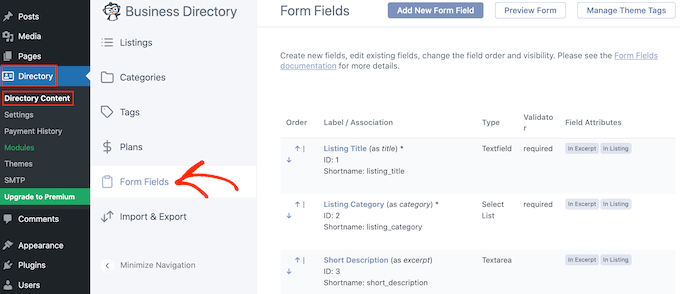
This screen displays all of the fields that comprise the standard form.
Simply click on the little up and down arrows in the ‘Order’ column to move a field in your form.
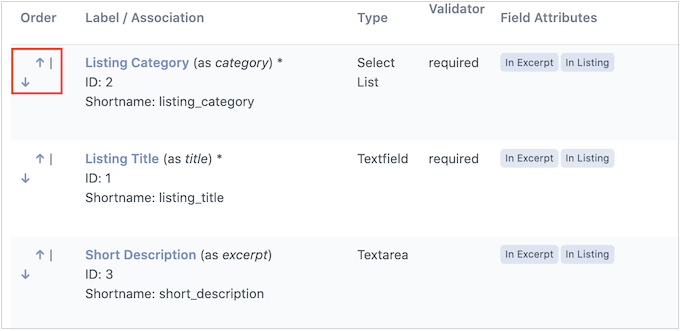
Hover your mouse over a field to remove it, then click the ‘Delete’ link that appears.
Finally, if you want to alter a specific field, hover your mouse over it and then click the ‘Edit’ link.
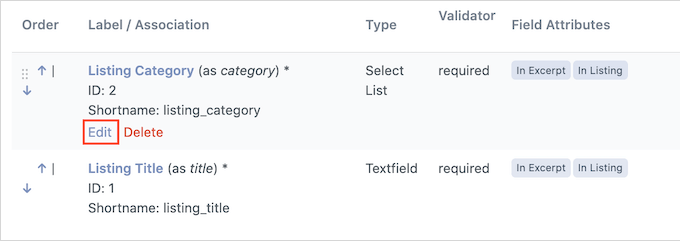
This takes you to a screen where you may edit the field label, make the field obligatory, provide an optional description, and do other things.
When you’re done, remember to click the ‘Update Field’ button to save your changes.

Following that, it’s a good idea to make some categories for individuals to use when submitting their listings. These categories will also assist visitors in navigating your directory and finding what they’re looking for.
This plugin comes with a single ‘General’ category by default, but you may create an additional by clicking on the ‘Categories’ tab. Next click the ‘Add New Category button.
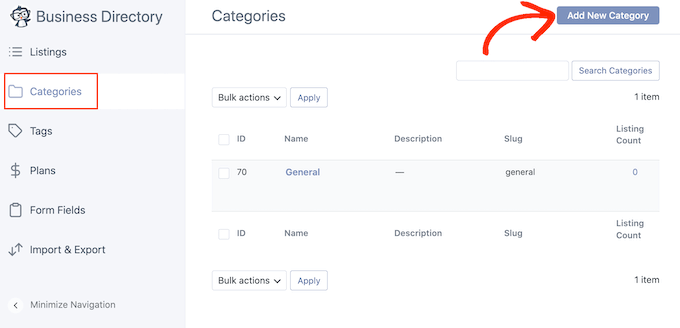
Provide a name for the category in the popup that displays.
You can also structure your categories into child-parent connections, similar to how WordPress organises child pages. Simply open the ‘Parent Category’ option and select a parent to convert a category into a subcategory.
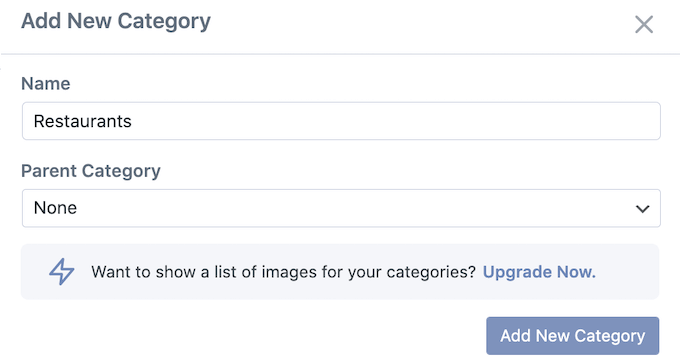
Click on ‘Add New Category’ to begin creating the category.
Repeat the method outlined above to add more categories to your company directory.
Visitors can now add a new listing by visiting your Business Directory page and clicking the ‘New Listing’ button.

This sends them to a screen where they may enter all of the listing information.
Finally, at the bottom of the page, they merely need to click the ‘Complete Listing’ button to submit their listing.

Each time a visitor submits a listing in this manner, you must manually approve it. In your WordPress dashboard, navigate to Directory > Directory Content.
A list of pending listings will now appear.
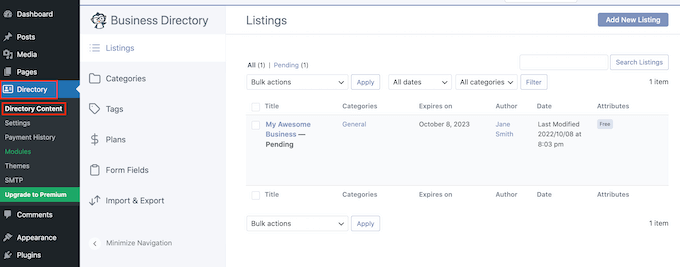
To view a listing in greater detail, hover your mouse over it and then click on the ‘Preview’ link that appears.
The listing will be opened in a new tab as a result of this.
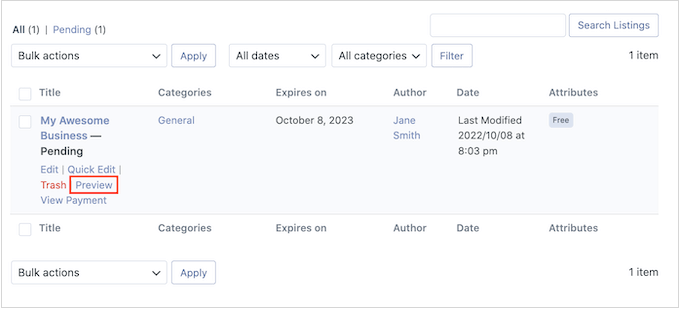
To make changes to the listing, hover your mouse over it again, but this time click on ‘Edit.’
You are now free to make any adjustments you desire. After you’re satisfied with the way it looks, click the ‘Publish’ button.

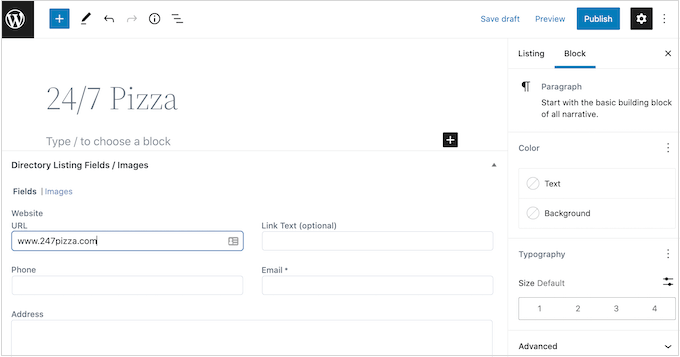
You can also create listings via the WordPress admin dashboard. You might wish to make listings for your partners, for example, so they don’t have to perform the work themselves.
To add a listing, navigate to Directory » Directory Content and select ‘Add New Listing.’

This brings up a screen where you may enter all of the information.
After you’re finished, click ‘Submit’ to publish the listing.
Wrapping Up
A web directory in WordPress is a practical way to showcase and organize content while also building a community around your website. By encouraging user-generated content and allowing visitors to submit their listings, reviews, and other contributions, you can create a valuable resource that benefits both your audience and your website. With WordPress’s flexibility and various add-ons, you can customize your directory to fit your niche and monetize it if desired. So if you’re looking to create a powerful online presence, consider starting a web directory on your WordPress site today!