Live YouTube streams have become a popular way for content creators to engage with their audience in real time. By enabling users to participate in the stream through live chat, polls, and other interactive features, live streams can increase engagement and create a sense of community among viewers.
One of the best things about live YouTube streams is that they can easily be embedded into WordPress websites. This means that website owners can take advantage of the engagement-boosting benefits of live streams without having to redirect their audience to a different platform.
Embedding a YouTube live stream in WordPress is a simple process that can be done in just a few steps. By following the instructions in this article, website owners can quickly and easily add a live stream to their website and start engaging with their audience in real time.
Why Upload YouTube Live Streams to WordPress?
Live streaming enables you to broadcast real-time audio or video content over the internet so that viewers can watch it right away.
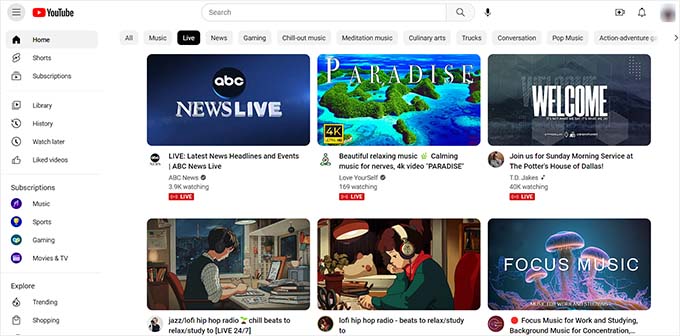
Connecting with your audience and expanding your user base is made possible by embedding a YouTube live stream on your WordPress website.
By enabling interaction with website visitors, it can also increase user engagement.
Additionally, a YouTube live stream can increase website traffic and SEO. According to research, blog posts with at least one video receive about 83% more visitors than those without.
In light of this, let’s look at how simple it is to embed a YouTube live stream in WordPress.
How to Integrate a YouTube Live Stream in WordPress
The YouTube Feed Pro plugin from Smash Balloon is the simplest way to embed a YouTube live stream.
The best WordPress YouTube feed plugin makes it possible to embed live streams and YouTube videos on your website.
Installing and turning on the YouTube Feed Pro plugin is the first step.
NOTE: A free version of YouTube Feed is available, too. The Live Stream feature is not supported, though.
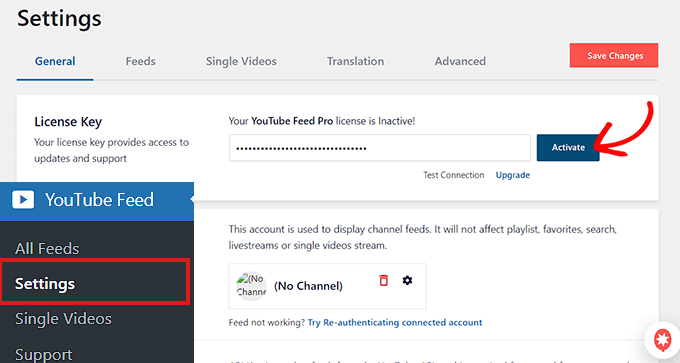
You must go to the Youtube Feed » Settings page from the admin sidebar after the plugin has been activated. The licence key must be entered here, followed by a click on the “Activate” button.
The Smash Balloon website’s Accounts page is where you can find the licence key.
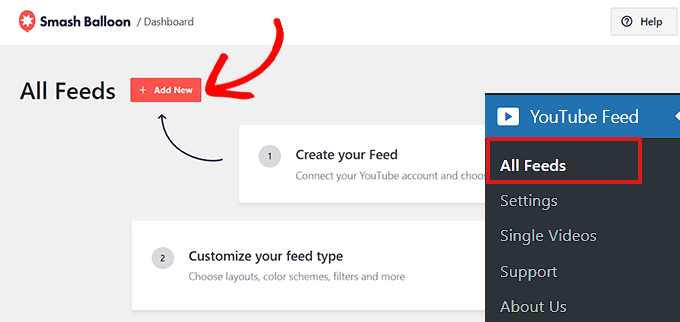
The next step is to navigate to the WordPress admin sidebar’s YouTube Feeds » All Feeds page.
Simply select the ‘Add New’ button at the top from here.
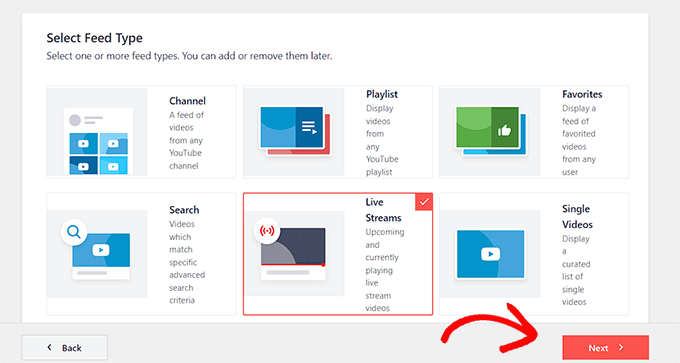
The ‘Select Feed Type’ prompt will then appear as a result.
To proceed, you must now select the ‘Live Streams’ option and then press the ‘Next’ button.
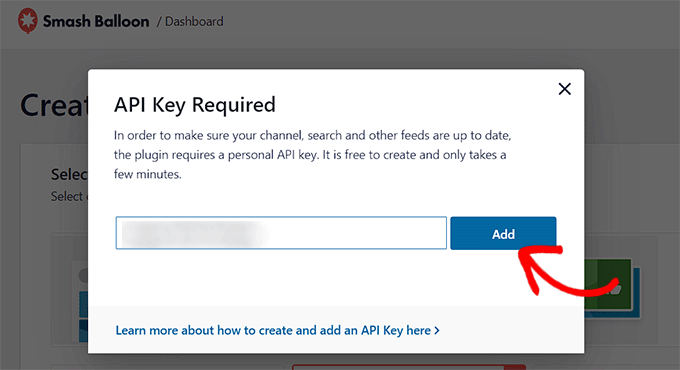
The following step involves linking your YouTube account to YouTube Feed Pro. Your YouTube API key must be entered when prompted.
If you already have an API key, all you need to do is copy it, paste it, and click the “Add” button.
Establish a YouTube API Key.
You must visit the Google Cloud Console and log in with your Google account if you don’t already have an API key.
Once you have logged in, select a project by clicking the button at the top.
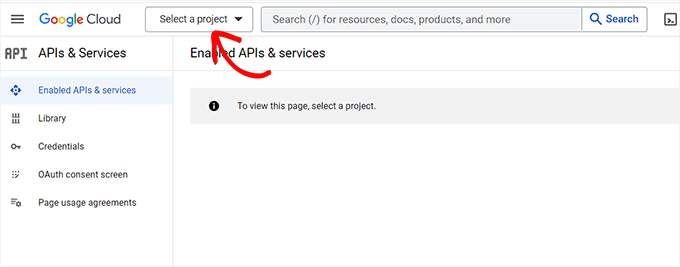
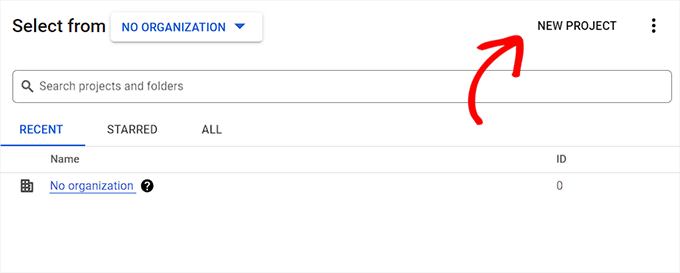
By doing this, a pop-up window displaying all of your projects will open.
Simply select the “New Project” button at the top to continue.
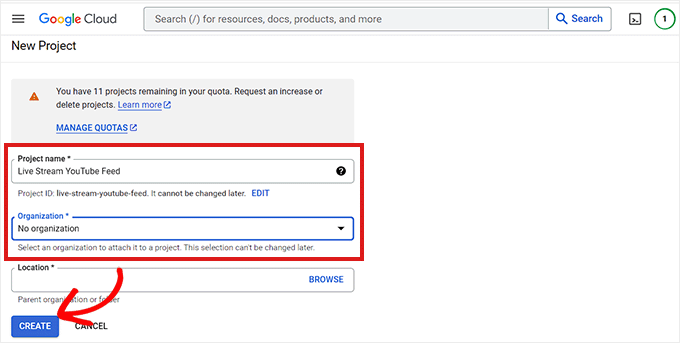
When you arrive at the ‘New Project’ page, you can begin by entering the name of your project. This could be anything that makes it simple for you to recognise it.
From the dropdown menu, choose a “Organization” and its location. To proceed, select “No Organization” and press the “Create” button.
You will be directed to the project dashboard once the project has been created.
You must then click the ‘+ Enable APIs And Services’ button in the top menu from this point.
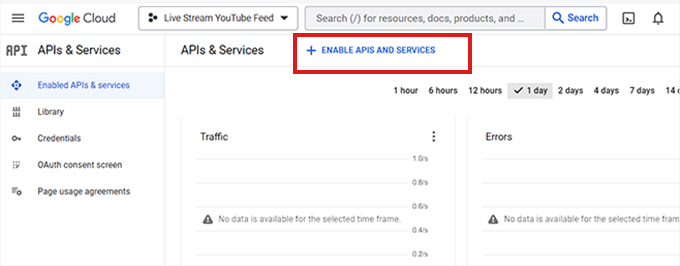
This will direct you to the page for the API Library. It displays the various Google services for which you can develop APIs and use them in your works.
Go ahead and enter “YouTube Data API v3” into the search field now.
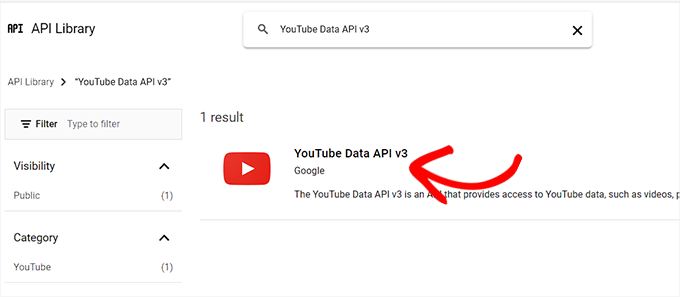
Simply click on the “YouTube Data API v3” result when it appears.
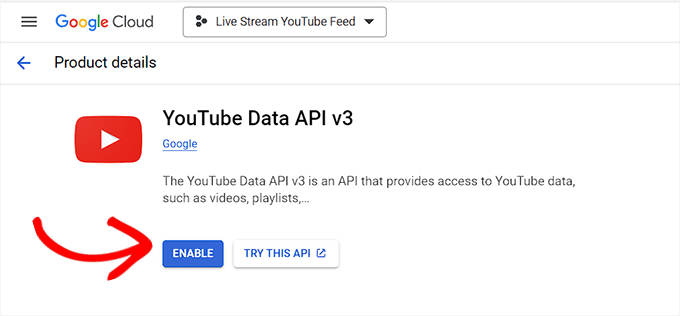
By doing so, you’ll be taken to a new page where you must click the “Enable” button to make the YouTube API key active.
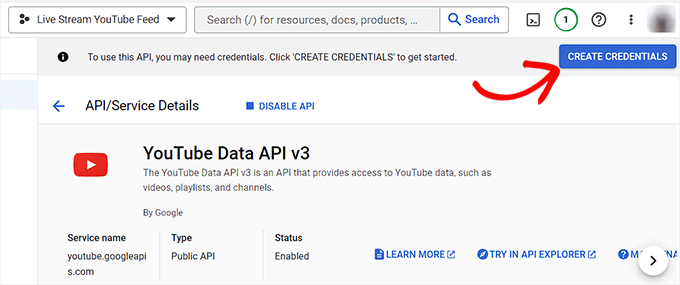
The ‘API/Service Details’ page will now be displayed to you.
Simply select the ‘Create Credentials’ button at the top from here.
You will then be taken to a new page where you must select the “Public Data” checkbox.
To create your API, click the ‘Next’ button after that.
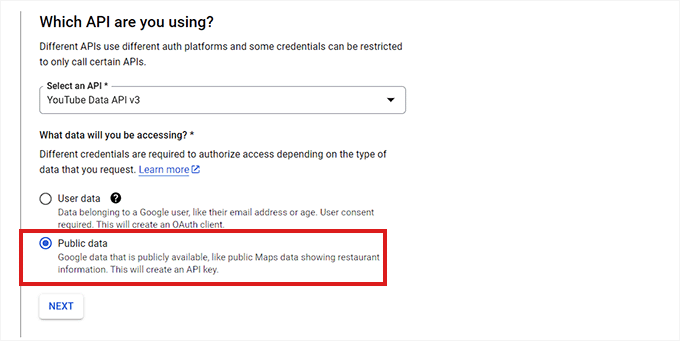
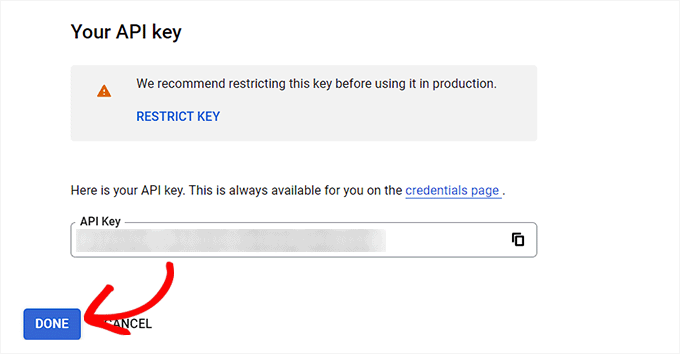
Now that it has been generated, your API Key will be visible on the page.
Copy the API key, then click “Done” to finish.
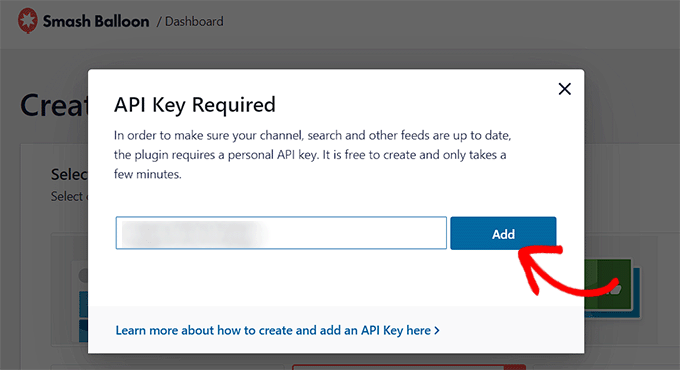
It is now time to return to the WordPress dashboard.
Paste the API key into the box marked “API Key Required” now. Next, press the “Add” button to proceed.
Connect Your WordPress Website to the YouTube Live Stream
You will be taken to the ‘Select Feed Type’ page after adding your YouTube API key.
From here, you must select the ‘Live Stream’ option once more before pressing the ‘Next’ button.
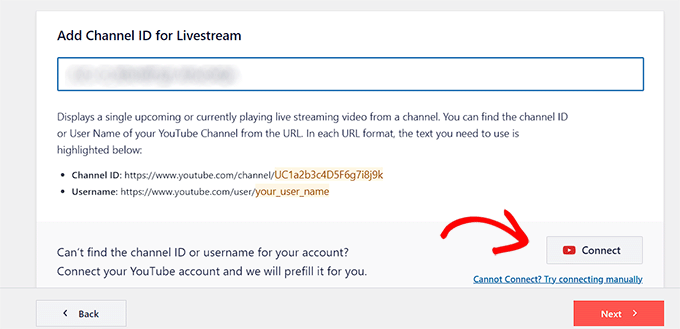
Following that, the “Add Channel ID For Live Stream” page will appear.
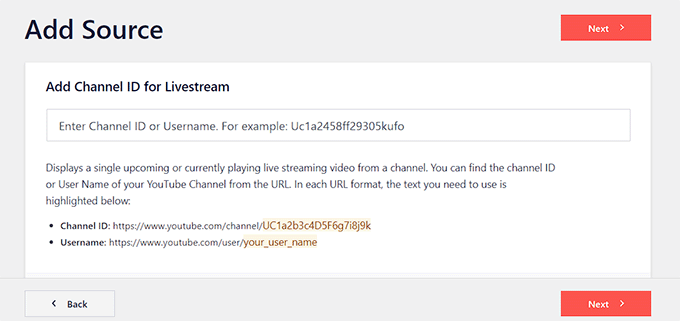
You must now go to the YouTube channel where your live-stream videos are located.
Copy the text that follows ‘/channel/’ or ‘/user/’ in the URL at the top from this point on.
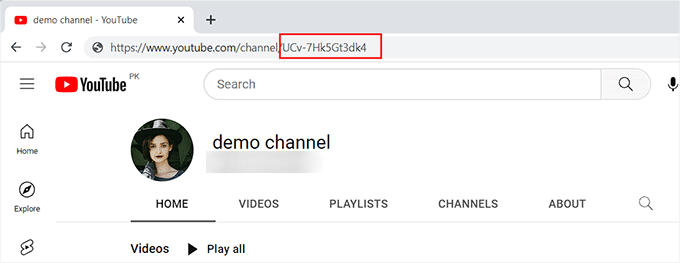
In the ‘Add Channel ID for Livestream’ box on the WordPress dashboard, paste the code after returning there.
Then, to link your YouTube channel with WordPress, click the “Connect” button.
You must select the ‘Next’ button to proceed after the channel has been established.
Create a Custom YouTube Feed
You can customise your YouTube live stream feed now that it has been created. The YouTube Feed Pro by Smash Balloon has numerous display options.
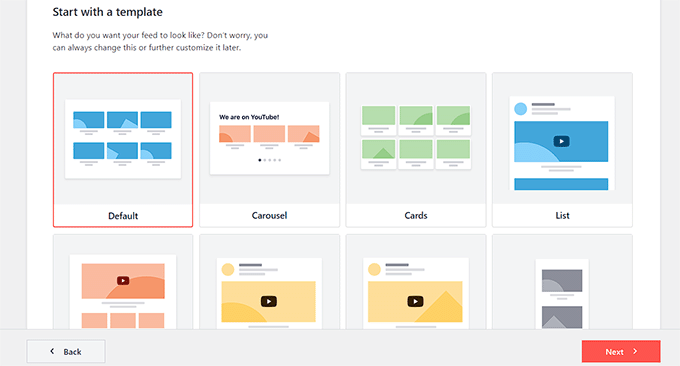
On the ‘Start with a template’ page, you must first select a template. The layout options include Default, Carousel, Cards, List, Gallery, and Grid.
Once you’ve made your decision, just press the “Next” button.
After selecting a template, a screen for editing will appear with a YouTube feed preview to the right and customization options in the left menu column.
The ‘Feed Layout’ panel can be expanded to get started here.
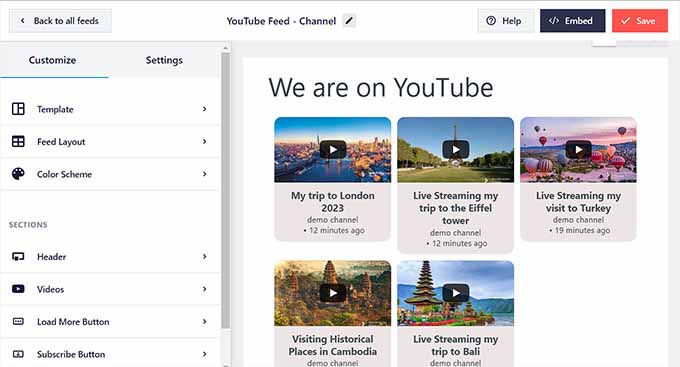
You can change between the layouts on this screen.
Depending on the layout you choose, you might be able to configure additional settings as well.
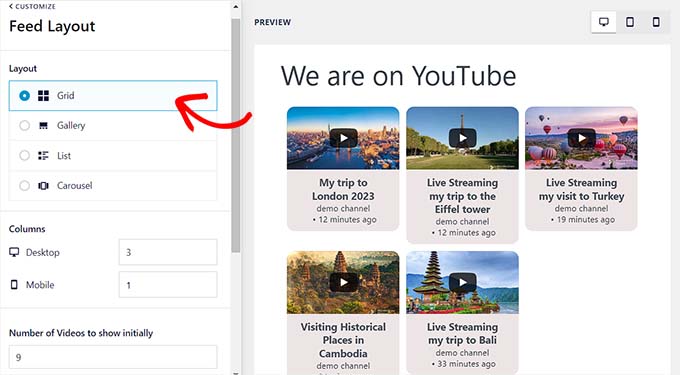
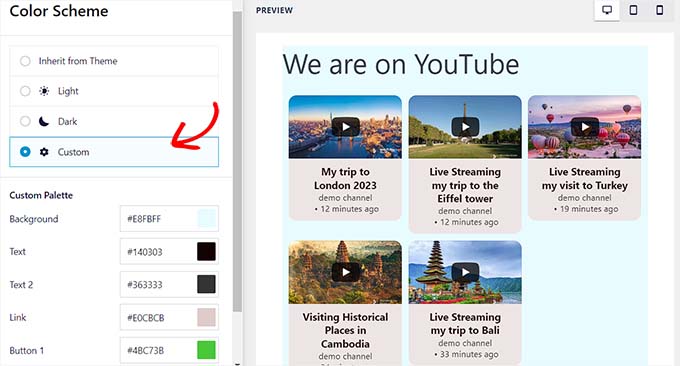
The ‘Colour Scheme’ panel must then be selected.
YouTube Feed Pro automatically matches your WordPress theme’s colour scheme. For the video feed, you can also choose a “Light” or “Dark” colour scheme.
By selecting the ‘Custom’ option and then adjusting the controls to change the background, text, and link colors, you can also create your own color scheme.
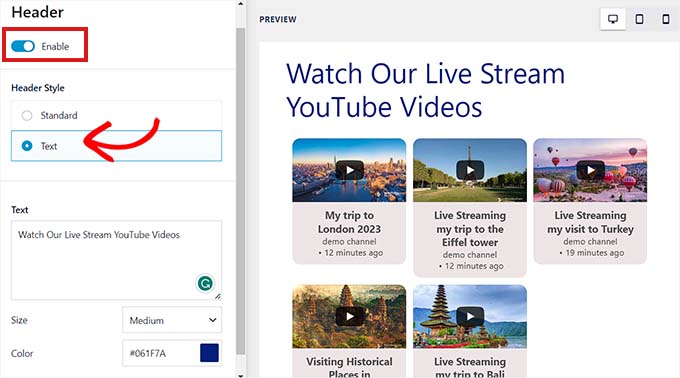
Visit the ‘Header’ panel in order to add a header to your YouTube feed. To activate the header from here, merely toggle the ‘Enable’ switch.
The controls also allow you to choose between the traditional and text header styles for headers. You can alter the text’s size and color by selecting the ‘Text’ option.
By accessing the ‘Videos’ panel, you can also change the way the video player looks.
The options listed below can be selected.
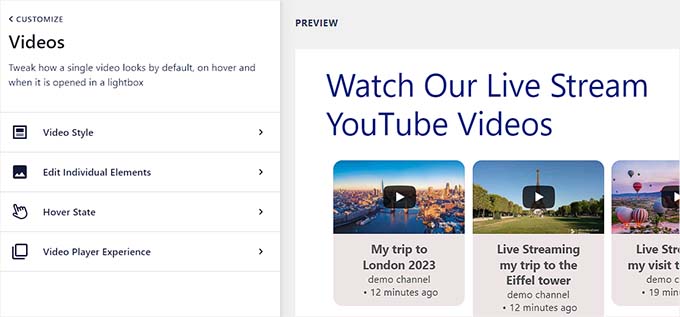
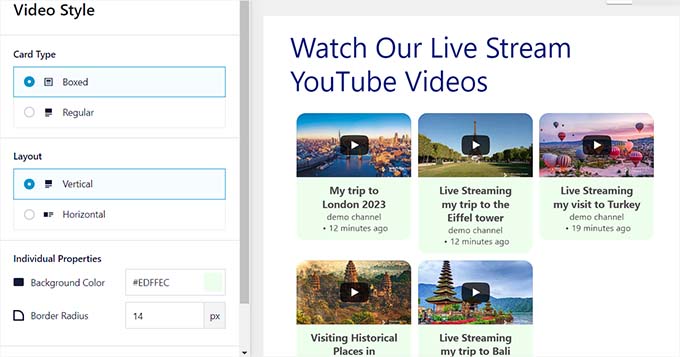
You must go to the ‘Video Style’ settings panel if you want to change the video layout and specific properties.
Here, you can choose the border color, background color, and video layout.
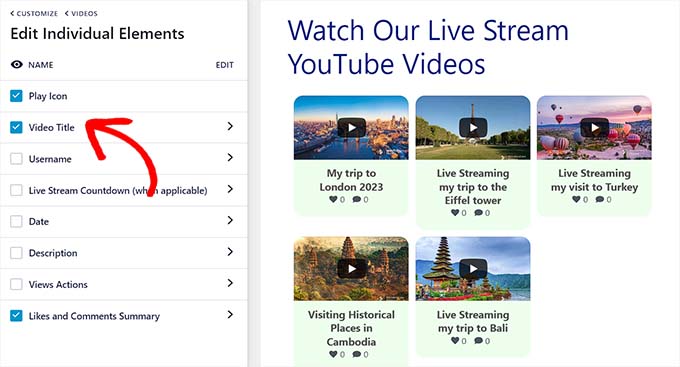
The ‘Edit Individual Elements’ panel should then be opened. Simply tick the boxes next to the items you want to see next to the YouTube live stream videos in this section.
The Play icon, video title, live stream countdown, descriptions, and more can all be displayed or hidden.
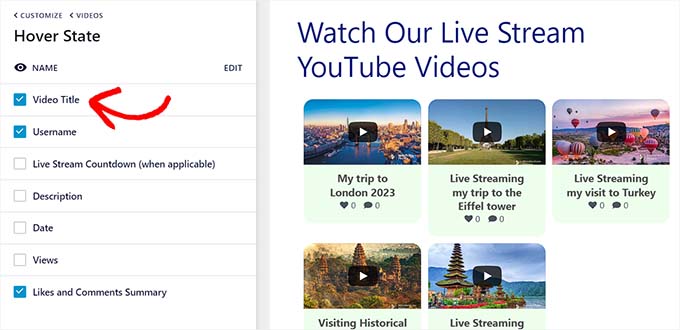
The ‘Hover State’ setting is where you should next go. You can select each component that will appear when a user hovers their mouse over the YouTube video here.
Numerous options are available, including the video’s title, description, date, number of views, and more.
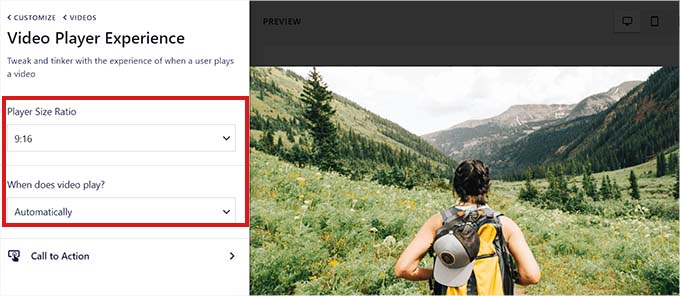
Visit the ‘Video Player Experience’ panel after that.
The aspect ratio of the video player can be modified from here. Additionally, you can decide whether the video should begin playing immediately or wait until the viewer clicks the play button.
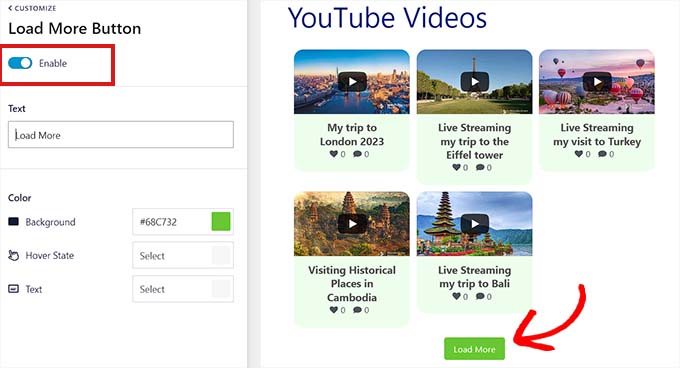
Switch to the “Load More Button” panel after customising the individual video elements.
You have the option of setting the toggle to “Enable” under the “Load More Button” setting here. After the live stream, more video suggestions will be shown here.
The settings in the left panel also let you select the background color, hover state, and text.
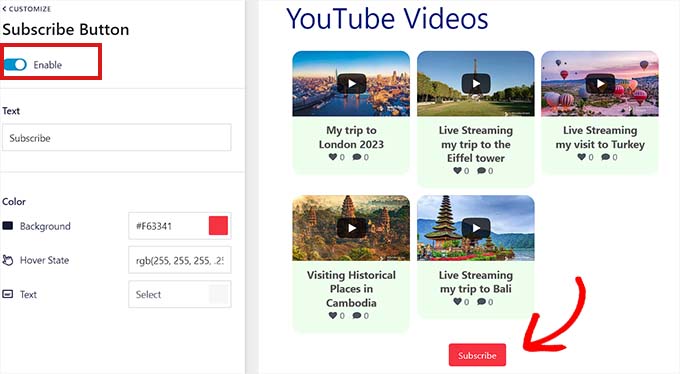
If you want to enable the YouTube subscribe button, go to the “Subscribe Button” panel and toggle the switch to “Enable.”
The settings also allow you to alter the button’s color, text, and hover status.
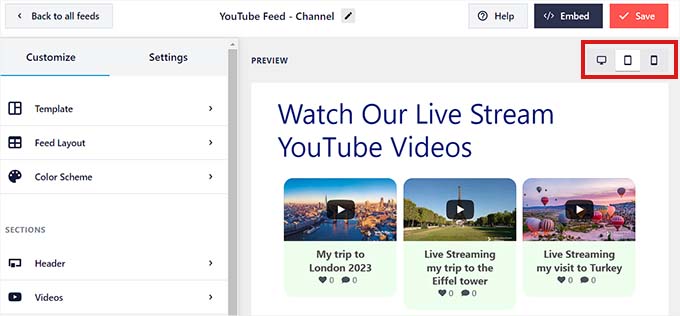
You can see a preview of how the YouTube live feed will appear on desktop computers, tablets, and smartphones after you’ve customised it. To preview the feed on different devices, simply click on the corresponding buttons in the top-right corner.
When finished, don’t forget to press the “Save” button to put the changes into effect.
Put a YouTube live stream embed code on a WordPress page
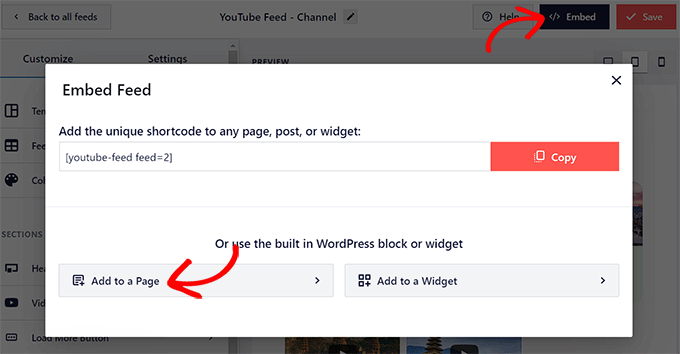
Installing your YouTube live feed on a WordPress page is the next step. The ‘Embed’ button at the top must first be clicked in order to accomplish this.
The ‘Embed Feed’ prompt will then appear as a result. To proceed, select the ‘Add to a Page’ button here.
A list of all the WordPress pages on your website will now appear in the popup.
To embed the YouTube live stream, just select the page and press the “Add” button.
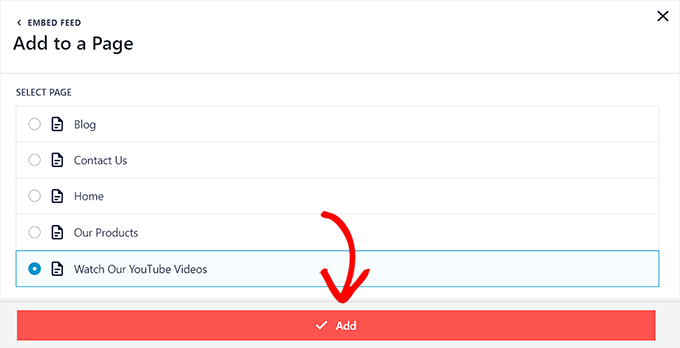
The block editor will now display the page you chose.
To add the “Feeds for YouTube” block, click the “Add Block” (+) button in the top left corner from here.
Once you’ve located it, click on the block to add it to your page.
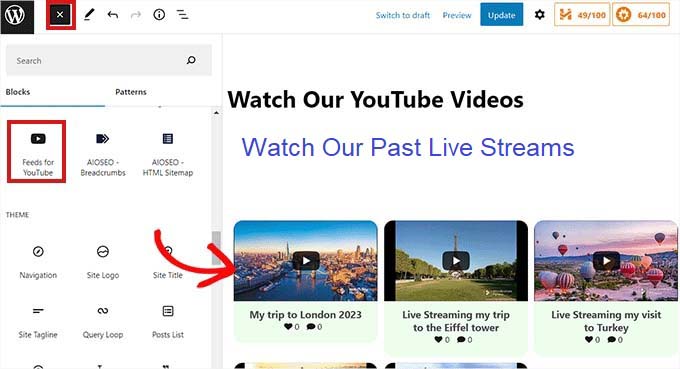
To save your changes or publish them, don’t forget to click the ‘Update’ or ‘Publish’ button.
On our test website, this is how the YouTube live feed appears.
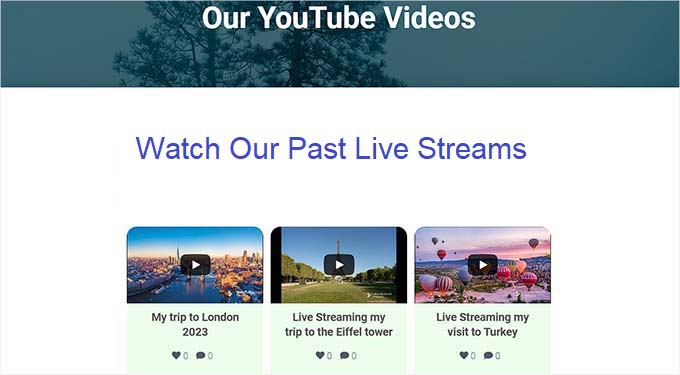
Widgetize a YouTube Live Feed.
A YouTube live feed can also be added as a widget to the WordPress sidebar.
The admin sidebar’s Appearance » Widgets page must be first visited.
From here, locate the “Feeds for YouTube” block by clicking the “Add Block” (+) button in the top left corner of the screen.
The block can then be added to the widget area by clicking on it.
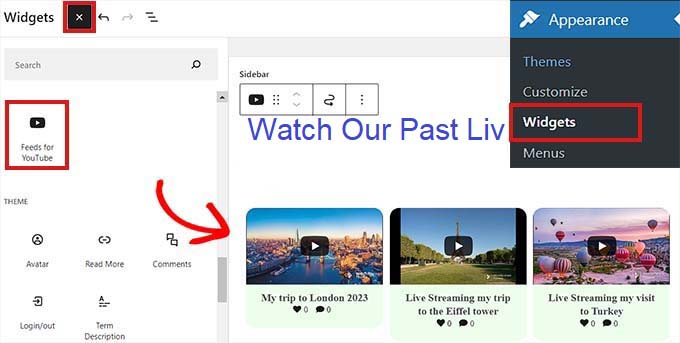
The ‘Update’ button must be clicked in order for your changes to be saved.
The YouTube live feed appears like this in the sidebar on our test website.
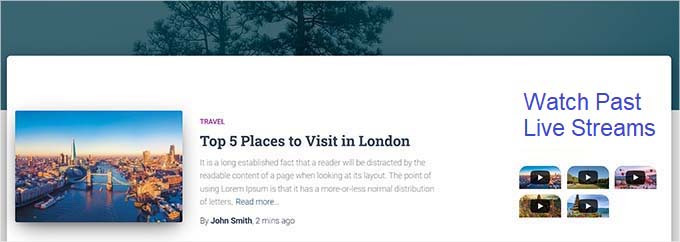
Preview of the YouTube feed widget
In the Full Site Editor, include a YouTube Live Stream.
This approach is appropriate if your theme is block-based.
To open the site editor, first navigate to the Appearance » Editor page from the admin sidebar.
From here, select the ‘Add Block (+)’ button and then look for the ‘Feeds for YouTube’ block.
The block can then be moved to the location on your page where you want to show the YouTube feed.
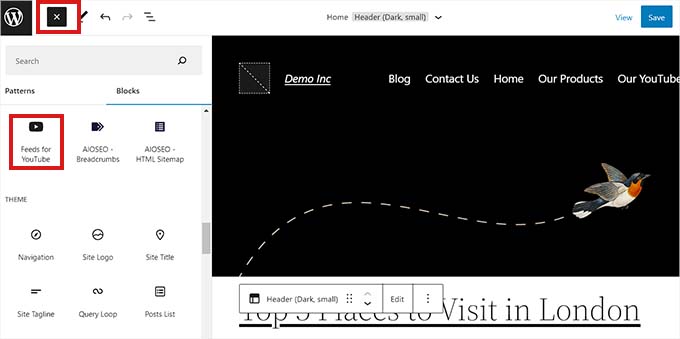
When finished, don’t forget to press the “Save” button to put the changes into effect.
The live streams on our demo website are shown here in advance.

Wrapping Up
Embedding a YouTube live stream on your WordPress website can significantly increase engagement with your audience, website traffic, and SEO. With the YouTube Feed Pro plugin from Smash Balloon, integrating a live stream is a straightforward process. By following the steps outlined in this article, you can easily add a customised YouTube live stream to your WordPress page or widget area, providing your audience with real-time audio or video content. So, why not give it a try and see how it can benefit your website?
