
Do you want to use WordPress to make a quiz?
Quizzes may increase site engagement whether you’re assessing knowledge or producing viral content like Buzzfeed. They can even be used to gather customer suggestions and feedback so you can enhance their experience.
Why Include Quizzez on Your WordPress Website?
Quizzes are enjoyable and interesting. Users find them more satisfying than other forms of expression because they are so engaging.
Since the very beginning of the internet, marketers have used quizzes to generate leads. You may, for instance, request the visitor’s email address in order to send them their quiz results or to subscribe to your email newsletter.
They’re also a wonderful approach to encourage users to share their results on social media. Probably the most well-known example of a viral quiz is BuzzFeed.

Quizzes are a crucial tool for assessing the knowledge of students and fortifying their understanding if you sell online courses. These automated quizzes make it simple to enhance the learning environment for students.
This could result in more purchases and is much more engaging than requiring them to read through product descriptions. So with that said, let’s see how to quickly design a quiz in WordPress.
WordPress Quiz Creation Using Formidable Forms
We’ll be utilizing the Formidable Forms plugin for this guide. One of the best WordPress quiz plugins available, it enables you to develop complex quizzes using a straightforward drag-and-drop builder.
One of the top WordPress form builder plugins is Formidable Forms. This indicates that you can use it to create a variety of forms, such as contact forms, registration forms, booking forms, and more, once it has been set up on your website.
Step:1 Install the Formidable Forms and Quiz Maker Addon as the first step.
You must use the Formidable Forms Business plan, which comes with the Quiz Maker addon, in order to create quizzes. The Formidable Forms plugin needs to be installed and activated first.
You must install Formidable Forms Lite after activation. The basic building blocks for the more sophisticated capabilities of the premium plugin are provided by this free plugin. Afterwards, go to the Formidable Forms » Global Settings page in your dashboard and choose “Click to enter a licence key manually.”
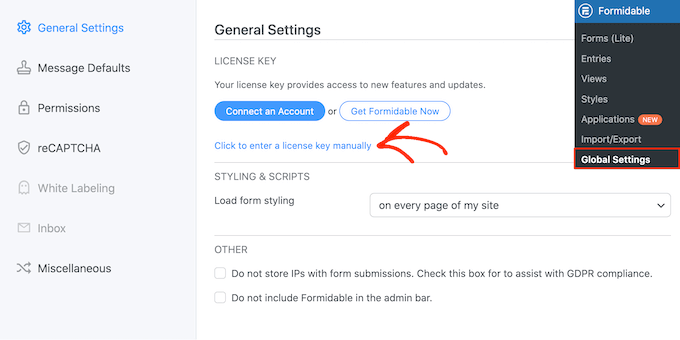
On the Formidable Forms website, your account has the licence key. Click the “Save License” button after entering this information.
The next step is to install the Quiz Maker addon by heading to Formidable » Add-Ons. Pick the Quiz Maker extension on this screen, then click the Install button.
Formidable Forms will designate the Quiz addon as “Active” after a brief delay.
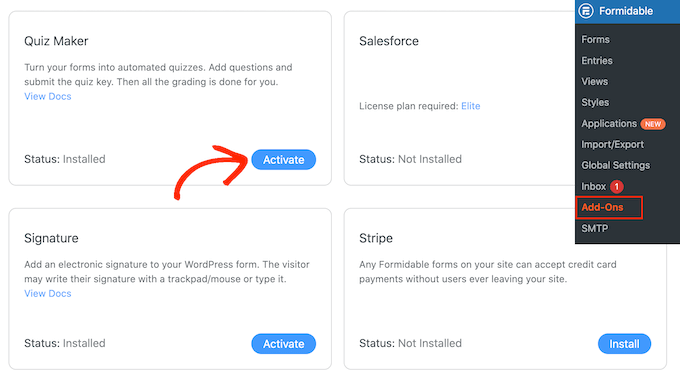
Step 2: Use Formidable Quiz Maker to create a WordPress quiz.
You can now create your own WordPress quiz after installing the Formidable Forms quiz maker.
Go to Formidable » Forms and click the ‘Add New’ option to begin.
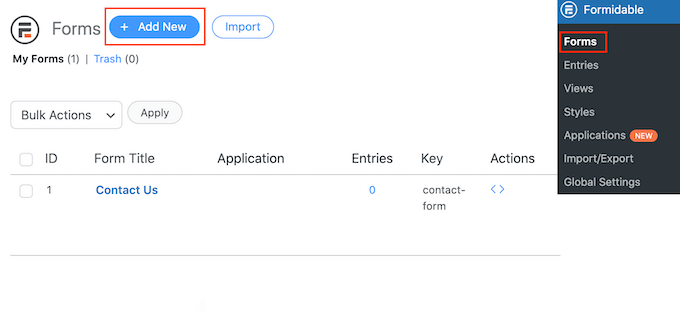
When you do this, a popup window displaying all of the plugin’s pre-made templates, including those for building booking forms and mortgage calculators, appears.
Since we’re beginning from scratch in this manual, select “Blank Form.”
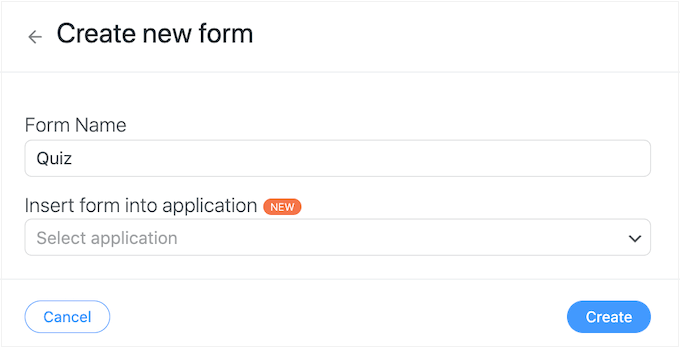
After doing that, put a title and an optional description in the “Form Name” area. You can use anything you like with this information since it is only provided for your reference.
Then, just press the “Create” button.
This will launch the Formidable Forms editor and display the template.
A live preview is on the right, and a menu with all the fields you may drag and drop into your quiz is on the left.
Quizzes can be made for a variety of objectives, such as gathering consumer feedback, conducting market research for your WordPress blog, evaluating reader knowledge, and more. With WordPress Quiz Plugin, you can create customized quizzes tailored to your goals, helping you engage users and collect valuable insights effortlessly.
Depending on the type of quiz you’re making, you might need a variety of fields. We’ll provide you an example of how to make a straightforward quiz that checks the visitor’s knowledge. Different types of questions, such as multiple choice ones, will be developed.
Simply drag a field from the left-hand menu and drop it onto the live preview to add it to your quiz. Start by including a “Text” field.
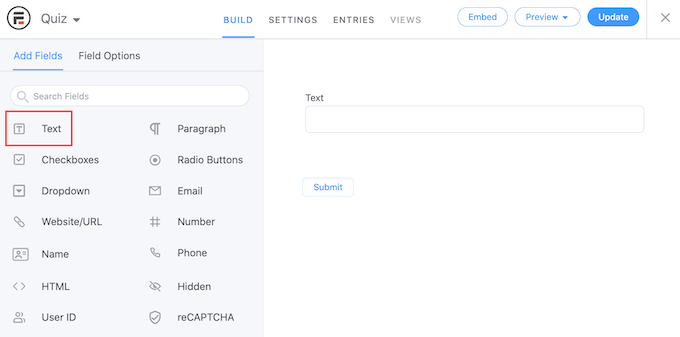
Then click in the live editor to choose your new “Text” field.
Then you can proceed and type your inquiry into the “Field Label.”
The next step is to construct a multiple-choice question.
Add a “Dropdown” field to the form by dragging it there.
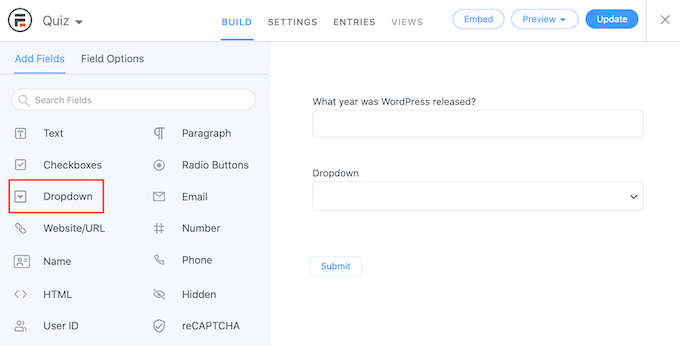
Repeatedly click the “Dropdown” field in the preview to the right and then enter your query in the “Field Label” box.
Now enter the potential responses into the “Dropdown Options” field.
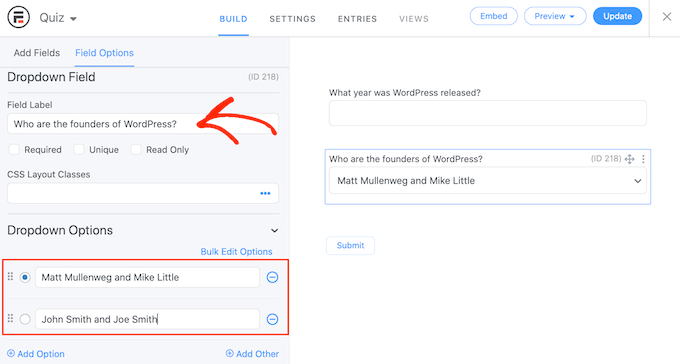
Simply click the “Add Option” button to add more options to your multiple-choice question. These procedures can be repeated if you want to add more quiz questions.
The correct answers and how to display the user’s score should be configured once you are satisfied with how the quiz looks.
Choose “Actions & Notifications” from the “Settings” page to accomplish this. You can now choose “Scored quiz.”
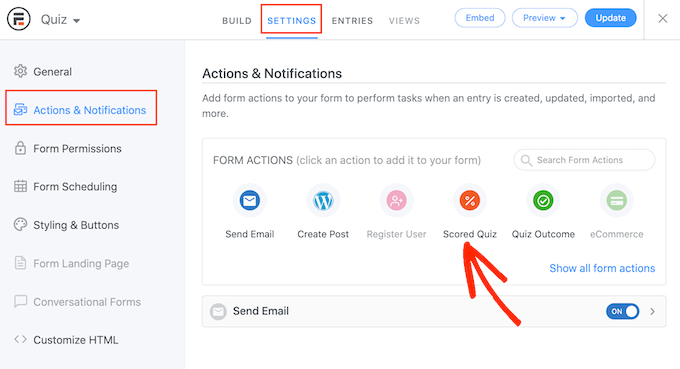
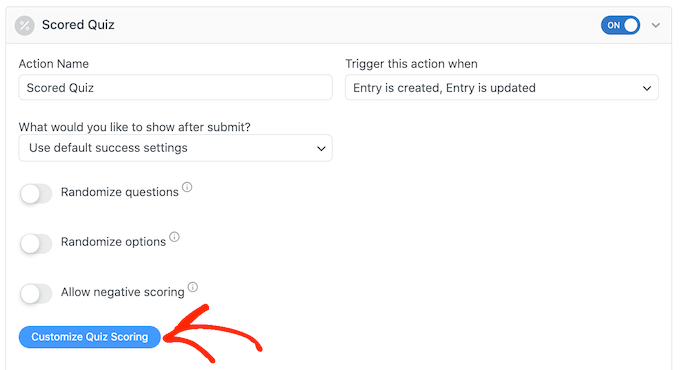
You can notice that this action already has some default options if you scroll to the new “Scored Quiz” section. It will be more challenging for people to cheat if the questions and answers are randomly generated by Formidable Forms.
These features are deactivated by default, but you may enable them by clicking on the ‘Randomize questions’ and ‘Randomize options’ toggles. Formidable Forms gives one point for each accurate response.
If advanced scoring is enabled, you can deduct points for incorrect responses. If you want to subtract points from your score, you can click to turn on the “Allow negative scoring” button. Advanced scoring will be covered shortly.

Now that the correct responses have been set, Formidable Forms may automatically grade visitors.
Choose “Customize Quiz Scoring” from the menu to accomplish this.
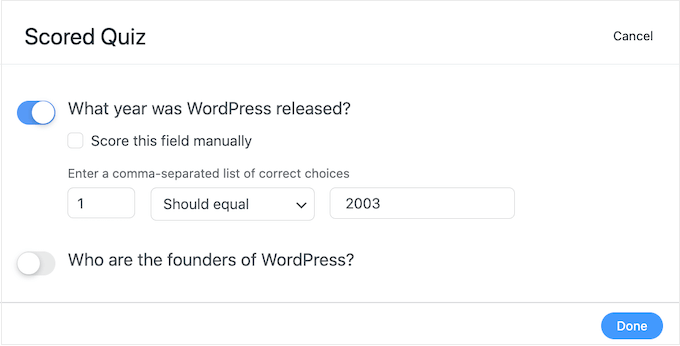
Simply click the toggle next to each question to add the correct answer.
Just enter the right response in the space for text questions. The dropdown menu also allows you to decide whether this text should be included in full, partially, or not at all in the user’s response.
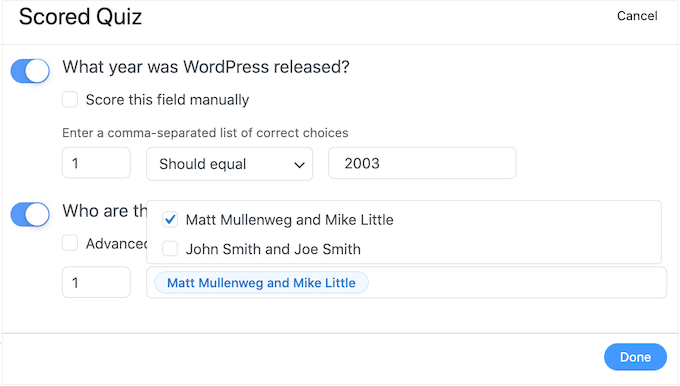
By selecting “Add Correct Answers” for multiple choice questions, a menu will all avail able answers will be displayed.
Now you can check the box next to each accurate response.
Each right response is worth one point by default. Simply enter a different number in the “Max score” box to grant more points.
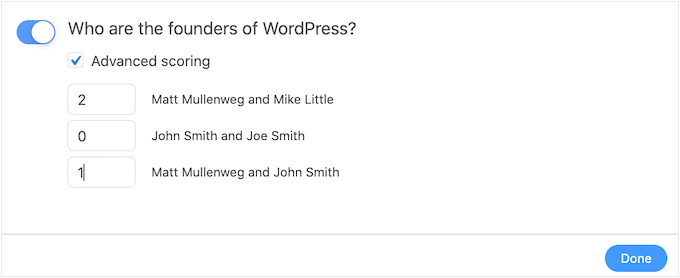
In some cases, you might wish to give each response to a multiple choice question a distinct score.
To accomplish this, choose “Advanced scoring,” and then enter the scores for each response.
Once you’ve entered all the accurate information, click “Done” to save your changes.
After that, you can specify the action that Formidable Forms will carry out each time a quiz submission is made. To view the available options, only click the following dropdown: What are your preferred next steps?
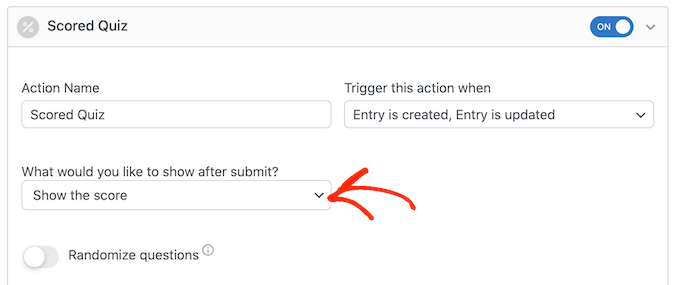
If you select “Show the score,” Formidable Forms will show the visitor’s score in a normal message.
An illustration of this can be found in the picture below.

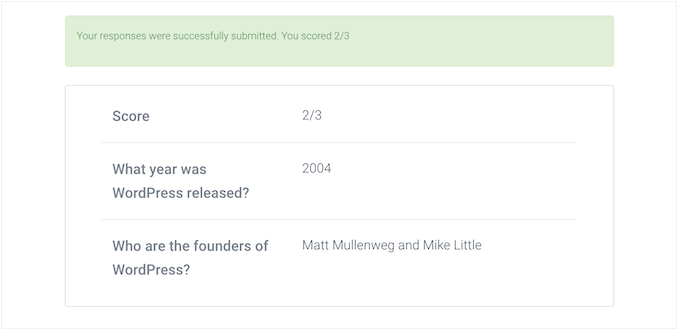
Formidable Forms will display the user’s score in addition to their responses if you choose to “Show user’s answers.”
By prompting users to analyze their responses and consider which questions they could have answered incorrectly, this can help reinforce learning.
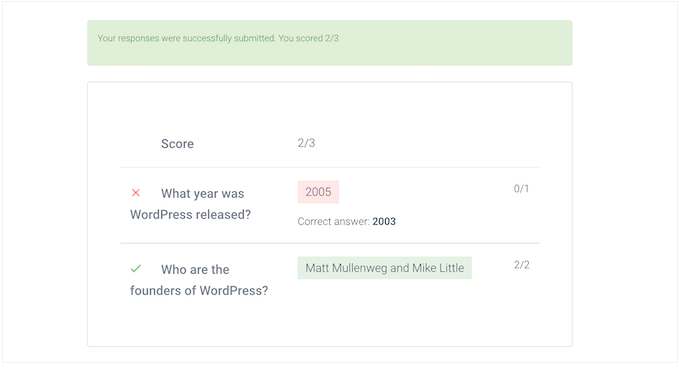
The option to “Show correct responses” allows users to view the questions they answered correctly.
If somebody answered a question incorrectly, Formidable Forms will display the correct response. Students can use this to learn from their errors.
However, giving learner the chance to retake the test is a bad idea since it could encourage cheating.
As a final option , you can choose “use default success settings”, which displays the following message : your response were successfully submitted.
Normally, you should modify this message to include the user’s rating.
To accomplish this, select “General” and edit the message under the “On Submit” section.
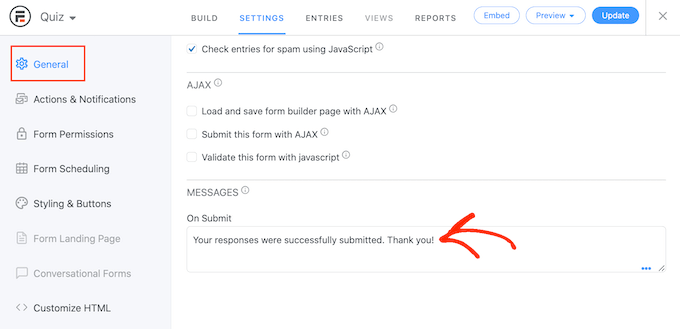
Simply add the [219] key to display the user’s score.
You can personalize messages for each user by using a “key,” which is a dynamic value.
For instance, you could type “your response was successfully sent”.
You received a [219].
Their score will be immediately substituted for the [219].

You can add more keys to your message to make it more unique.
Simply select the “Keys” tab in the tiny popup to view the various keys.
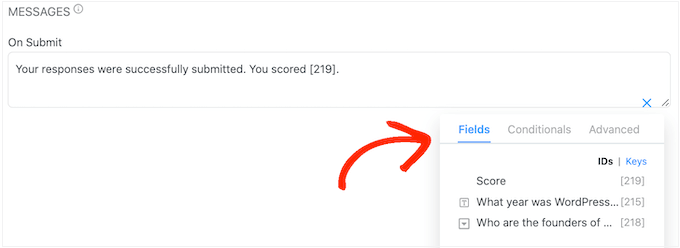
To save your changes, use the “Update” button after that.
Your first quiz has now been successfully generated.
Step:3 Making Your Test Available on Your WordPress Site
Now that your quiz is ready, you can add it to any post, page, or part of your WordPress theme that supports widgets. Although we’ll add the quiz to a page in our example, the procedures are the same for adding the quiz to other places on your WordPress site.
Go to Pages » Add New in your WordPress admin area to get started. Click the “+” button to add a new block once you’re in the content editor.
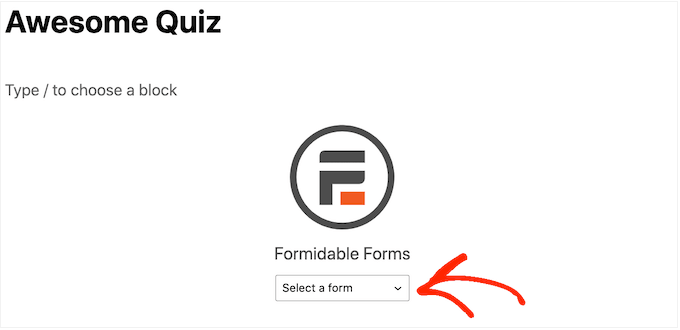
Add the block to your post after searching for “Formidable Forms” in the popup that appears.
After that, just select a form from the dropdown menu.
And then, select any quiz you’ve already developed, and WordPress will do the rest for you.
Now you can add any more content to the page, such as custom permalinks, categories, tags, and other information.
Publish or update the page when you’re ready. Users can now begin answering questions on your WordPress quiz.