Net Promoter Score is a popular approach for measuring client loyalty in order to improve your brand image, discover new product ideas, and give better customer service.
This article will demonstrate how to simply establish a Net Promoter Score survey in WordPress and how to use it to advance your business.
Net Promoter Score
Net Promoter Score is a management method used to assess client loyalty. Since its inception in 2003, the concept has been adopted by more than two-thirds of Fortune 1000 firms.
It relies on a single question: ‘How likely are you to refer our company, product, or service to a friend or colleague?’
The response is given on a scale of 0 to 10.
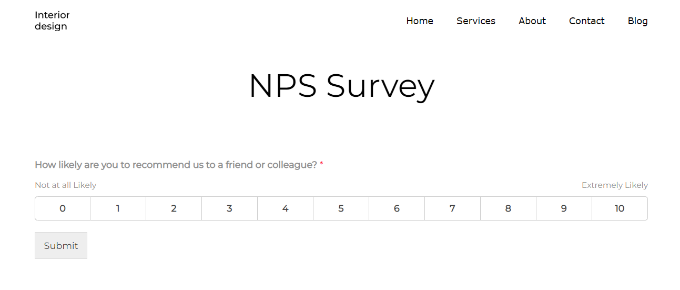
Customers that provide a score of 9 or 10 are referred to as “Promoters.” These clients are the most devoted to your brand and are most likely to make more purchases from you and recommend your company to others.
‘Detractors’ are users who respond with a score between 0 and 6. These clients are dissatisfied with your company and are less likely to make a purchase or promote it to others.
Customers that provide a score of 7 or 8 are referred to as “Passives.” They are less likely to actively refer your company and its products to their friends or coworkers, and they can either be supporters or opponents.
The percentage of critics is subtracted from the percentage of promoters to arrive at your ultimate NPS score. The total score is between -100 and 100.
A score of -100 indicates that all respondents are detractors, whereas a score of 100 indicates that all respondents are supporters. Typically, a score between 0 and 40 is regarded as good, and a score of 50 or higher is regarded as great.
We’ll demonstrate two ways to build an NPS survey in WordPress. You can use the plugins WPForms or UserFeedback.
Method 1: Using WPForms to create an NPS survey in WordPress (Recommended)
The WPForms plugin needs to be installed and activated initially.
You must have at least the Pro plan of the premium plugin WPForms to access the survey addon used in this tutorial.
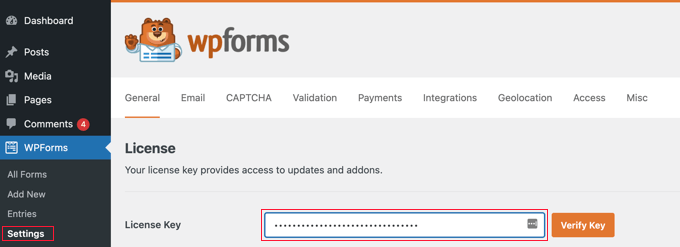
After activation, you must enter your license key on the WPForms » Settings page from within WordPress. On the WPForms website, this information can be found in your account area.
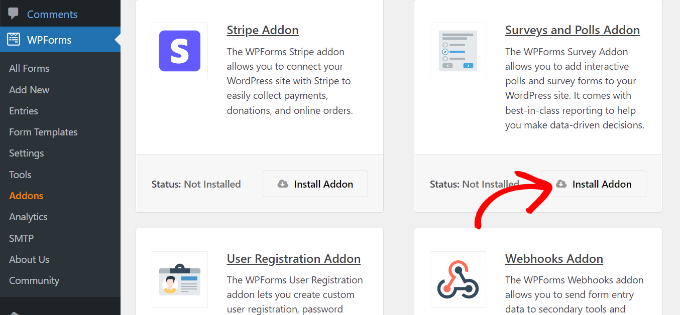
You must find the “Surveys and Polls Addon” on the WPForms » Addons page after entering your license key.
Click the ‘Install Addon’ button now. The addon will now be installed and activated by WPForms.
Your initial Net Promoter Score survey form is now ready for creation.
To create a new form, go to WPForms » Add New in the WordPress admin panel.
You must first choose a form template and then enter a title for your form. WPForms has a large selection of premade form templates. From the search bar on the left, you can easily look for an NPS form template.
We’ll use the ‘NPS Survey Simple Form’ template for this tutorial.
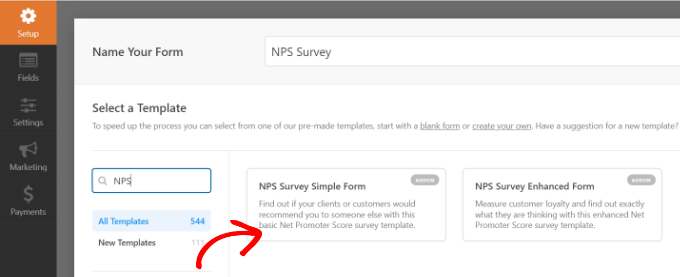
Now, some standard survey form fields will be loaded into the form builder interface by WPForms.
You can simply point and click to change any already-existing form fields or add new ones from the left column in our drag-and-drop form builder.
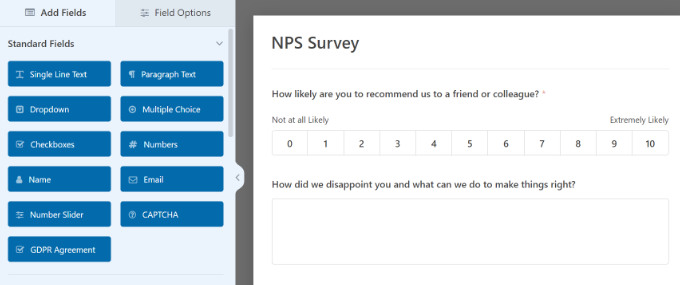
If you click on the form’s current fields, you’ll see more customization choices.
For example, you can edit the text for each question and make it a necessary field.
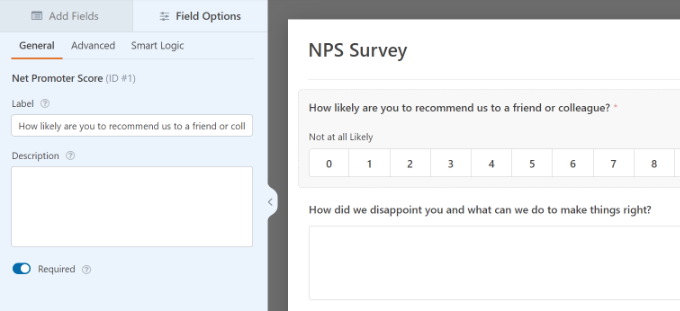
Your Net Promoter Score survey form is nearly complete. Obtaining the score alone isn’t very useful because you don’t know why these clients are unhappy or happy.
To receive more useful feedback from users, let’s add some smart conditional fields to the form.
Adding Your Net Promoter Score Survey to WordPress
WPForms makes adding forms to every post or page on your website a breeze.
To begin, simply click the ‘Embed’ button under the form builder.

Following that, you’ll see two options for embedding the NPS survey. You have the option of creating a new page or selecting an existing one.
For this, we’ll select the ‘Create New Page’ option.
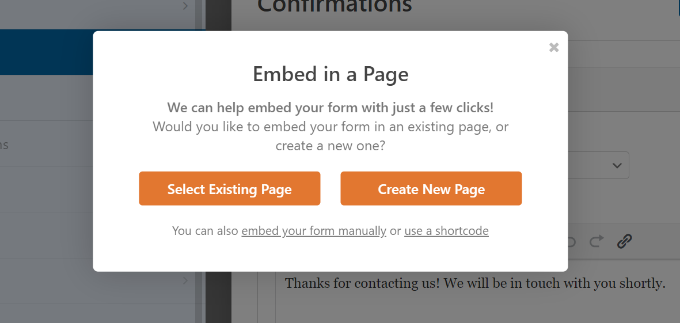
A pop-up window will then appear.
Simply give your new page a name and click the ‘Let’s Go’ button.
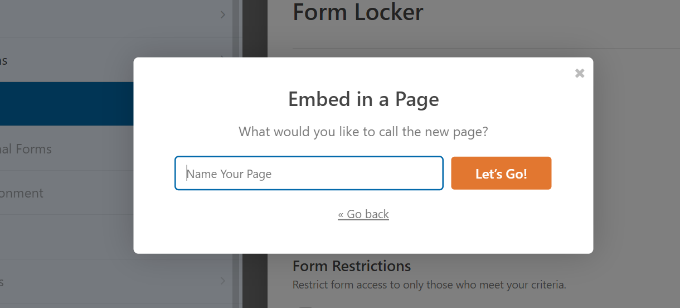
Your NPS survey form should now be embedded in the content editor.
You can also add the NPS form anywhere on your website by using the WPForms block.
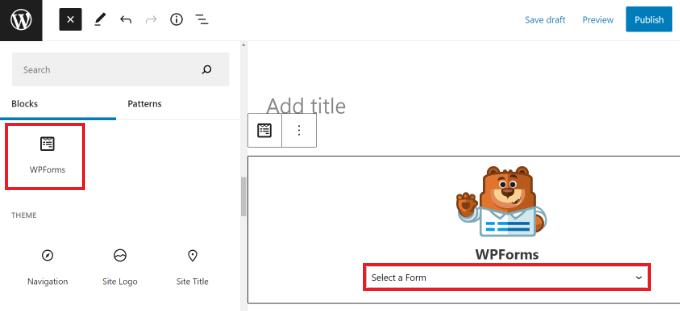
To add the WPForms block, simply click the ‘+’ icon. After that, choose your form from the drop-down menu.
You can now save your modifications and view the form on your website.
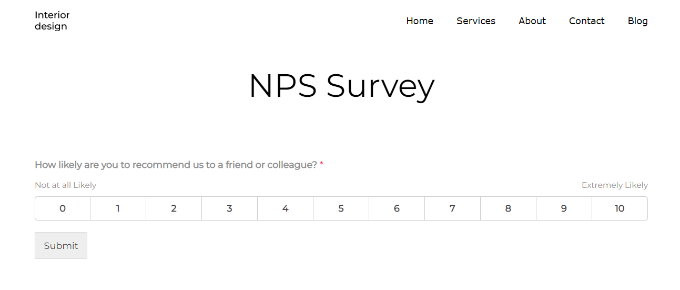
When a user selects a score between 0 and 6, another form field appears asking for input.
Viewing Your NPS Results
WPForms will begin computing your Net Promoter Score based on survey answers once your form is live. You can use an email marketing tool to give the NPS survey link to your consumers to urge them to complete it.
You could embed the survey form in OptinMonster and show it to users who satisfy particular conditions, such as after making a purchase in your WooCommerce store.
You can see your score when a few individuals have completed the form.
To do so, navigate to WPForms > All Forms in your WordPress dashboard and select the ‘Survey Result’ link under your Net Promoter Survey form.
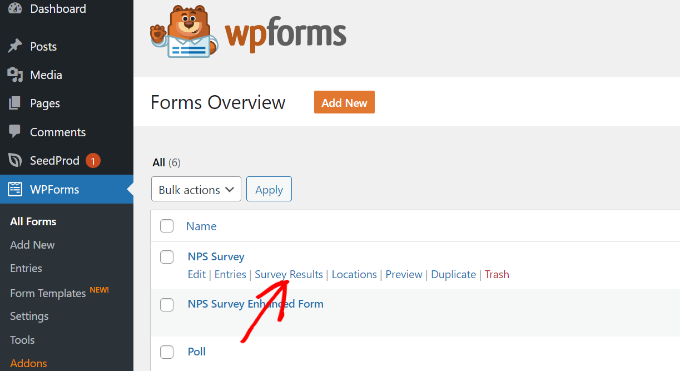
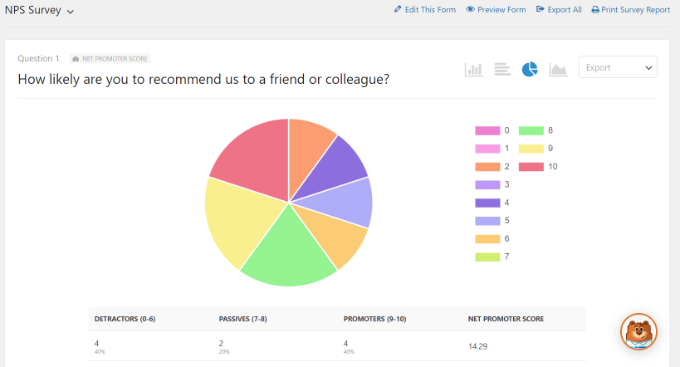
WPForms will now provide your overall Net Promoter Score as well as the number of promoters, critics, and passives. It will also present the results in visually appealing charts, bars, and graphs.
You may use user input to improve your product, introduce new features, and provide help to dissatisfied consumers, converting them into committed brand advocates.
Method 2: Using UserFeedback to Create an NPS Survey in WordPress
The UserFeedback plugin can also be used to produce a Net Promoter Score (NPS) survey in WordPress. It allows you to quickly and easily collect user feedback.
The plugin is extremely simple to use and includes pre-built templates to assist you in quickly creating an NPS survey.
We’ll use the UserFeedback Pro edition for this tutorial because it has more customization possibilities, 20+ themes, limitless questions and responses, and more. However, there is a free UserFeedback Lite version that you can use to get started.
WordPress UserFeedback Plugin Installation
You must first install and activate the UserFeedback plugin.
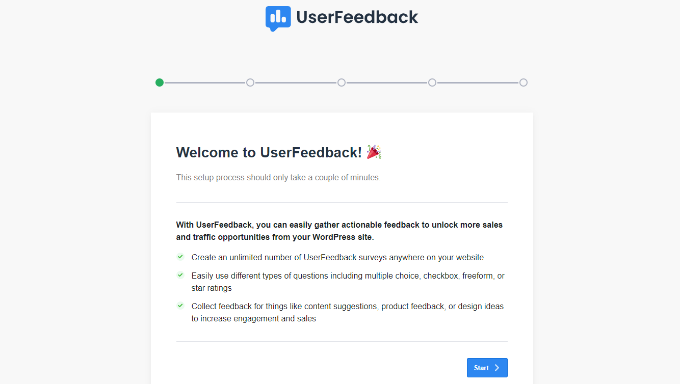
When you activate the plugin, it will launch the setup wizard. To begin, click the ‘Start’ button.
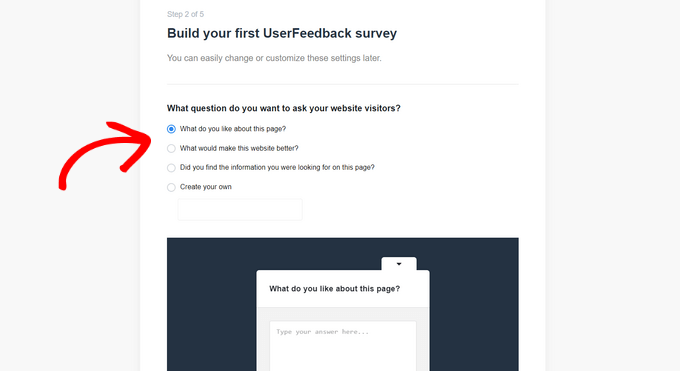
The plugin will then prompt you to create your first feedback survey.
Because we’ll be creating an NPS survey, you should select the default choice and go to the next stage.
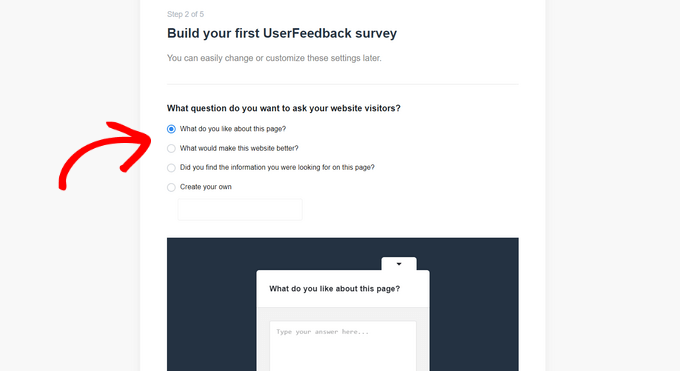
After that, you can enable various options in UserFeedback. These options are dependent on your licensing level.
Go ahead and enable the features you want to utilize before proceeding to the next step.
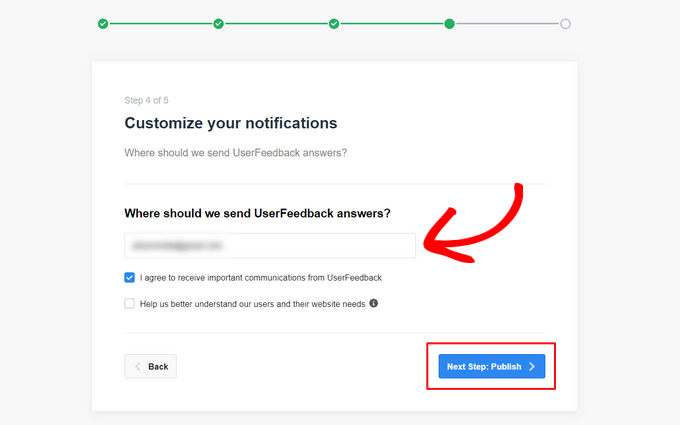
The UserFeedback plugin will now prompt you to input an email address where you will receive user responses.
Enter your email address and then click the ‘Next Step: Publish’ button.
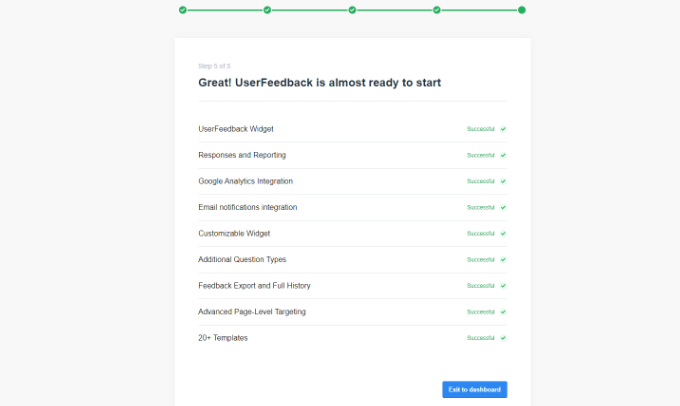
In the final phase, the plugin will then install everything, including the UserFeedback widget, addons, and other integrations.
When you’re finished, click the ‘Exit to Dashboard button’.
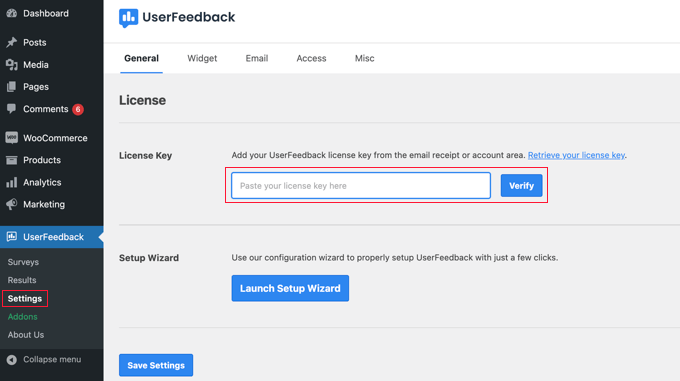
Once the plugin is installed, navigate to UserFeedback » Settings from the WordPress dashboard.
Following that, enter the license key and click the ‘Verify’ option. The key is simply accessible in your account section.
From here, navigate to UserFeedback Addons in the WordPress dashboard.
Then, by selecting the ‘Install Addon’ button, you may install the ‘Additional Templates’ and ‘Question Types’ addons.
The Additional Templates extension will grant access to the UserFeedback plugin’s 20+ survey form templates. The Question Types extension, on the other hand, will provide all question types for your feedback surveys.
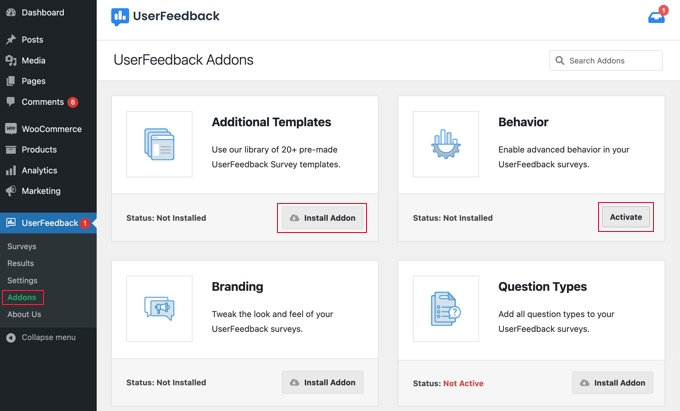
After installing the addons, you can activate them.
Let’s look at how to make one in UserFeedback.
Creating an NPS Survey with UserFeedback
Then, go to UserFeedback » Surveys and select the ‘Create New’ button to create a new survey.
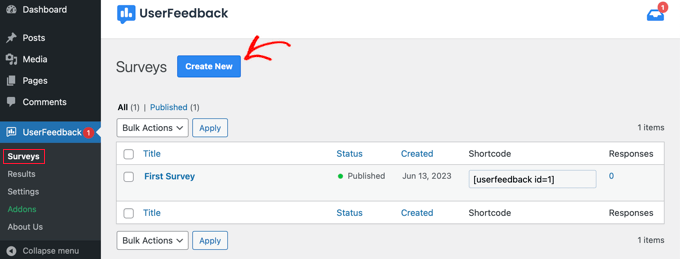
The plugin will then display a number of survey templates for you to choose from.
Select the ‘NPS Survey’ template.
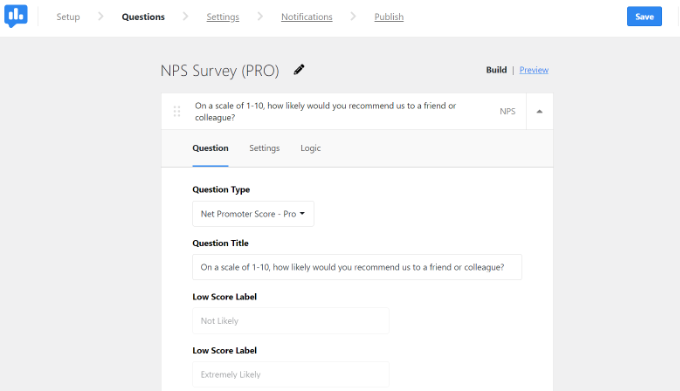
After that, the NPS survey will be prepared for you. The template will add a question and a rating scale for you.
You can, however, change the question type and title, as well as add a low score label.
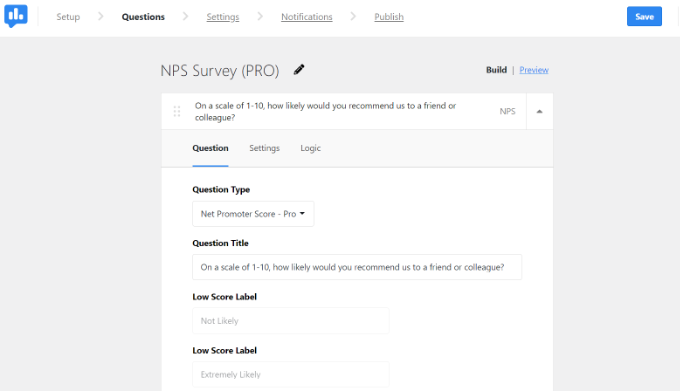
If you like, you may scroll down and add more questions to your NPS survey. Simply click the ‘Add Question’ button and choose the sort of question you want to add.
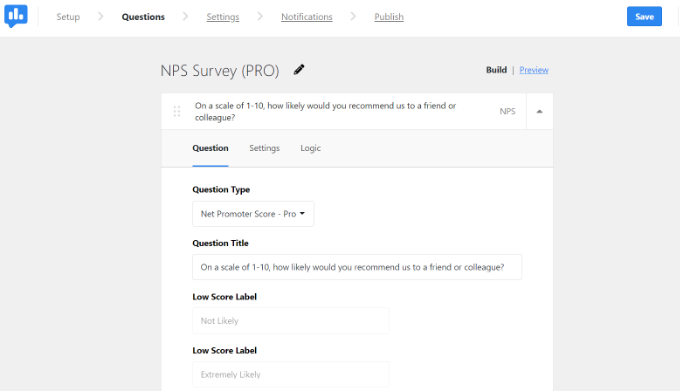
Then, at the top, select the ‘Settings’ tab.
You can make the question necessary for users to answer and enable a comment box here.
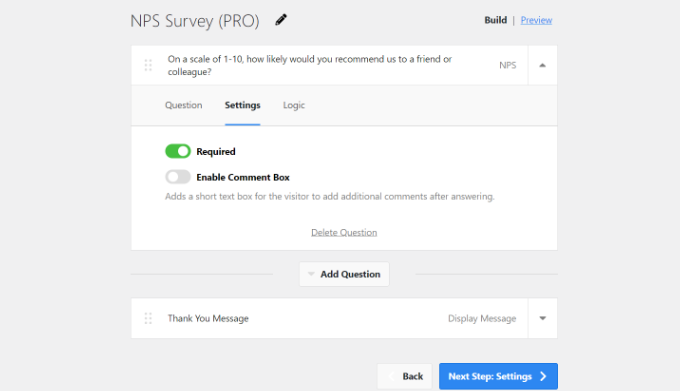
Aside from that, users can customize the thank you message that appears when they submit the survey form.
You can change the message’s text. After that, just click the ‘Next Step: Settings’ button.
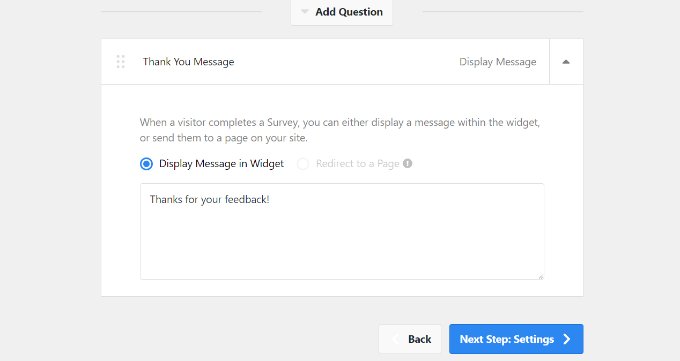
After that, if you have MonsterInsights installed, you may enable Google Analytics tracking.
It is the best WordPress Analytics plugin for installing Google Analytics without modifying code or hiring a professional. MonsterInsights also assists in the setup of complex tracking features such as form conversion tracking.
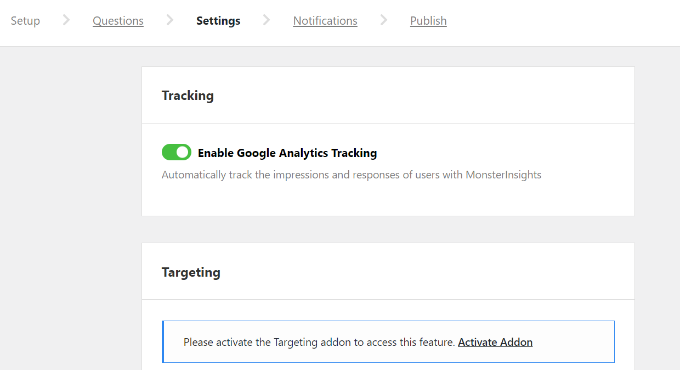
UserFeedback also has a Targeting addon that allows you to specify which devices and pages the NPS survey will appear on.
You can, for example, display the survey on desktop, tablet, and mobile devices. Furthermore, the plugin will display it on all pages by default. You can, however, change this and specify the criteria under which the survey will be displayed.
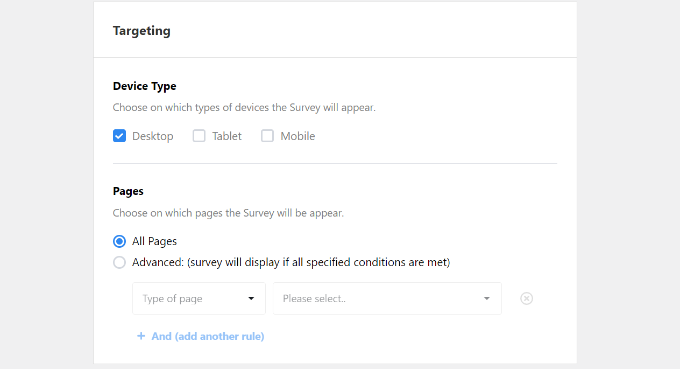
The Behavior section can be found by scrolling below.
You can configure the display time for your NPS survey here. There are options to display the survey after a delay, when a user is ready to exit a page, or when a user scrolls halfway through the page, for example.
Aside from that, you can display the display length of your survey and choose a survey run time. The display duration determines how frequently the survey will appear to a user, while the run time specifies how long the poll will show on specific pages.
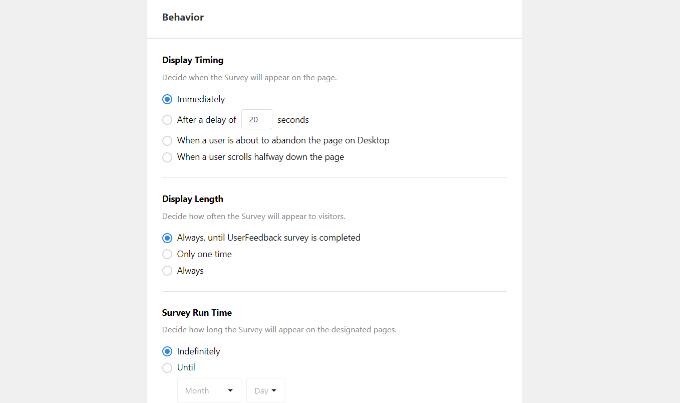
Finally, scroll down to see the ‘Start Survey Minimized’ option.
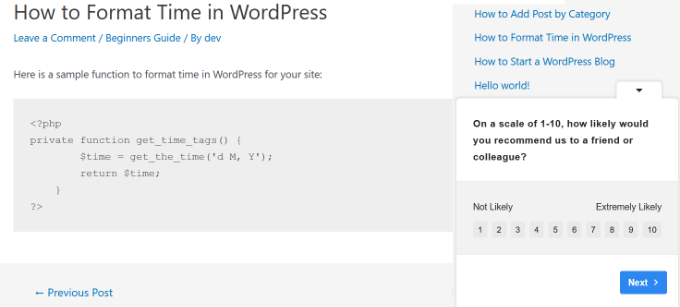
Enabling this will display a scaled-down version of the survey widget. When you’re finished, click the ‘Next Step: Notifications’ button.

The notification options for your NPS survey will appear in the following step.
You can enter your email address to get survey responses. You may also use the plugin to set up conditional logic for getting notifications.
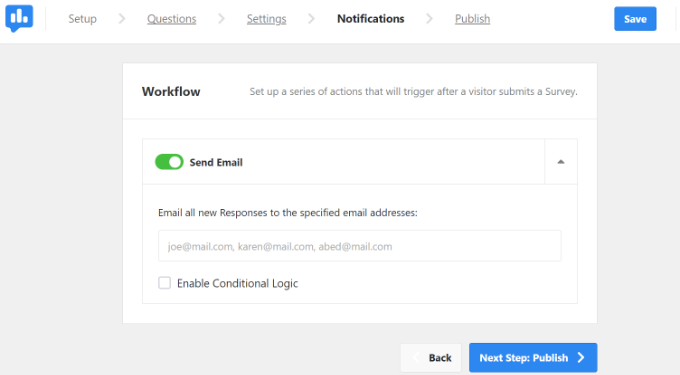
Once finished, simply click the ‘Next Step: Publish’ button.
You can alter the Survey Status from Draft to Publish or set a specific time and date for the survey to be published.
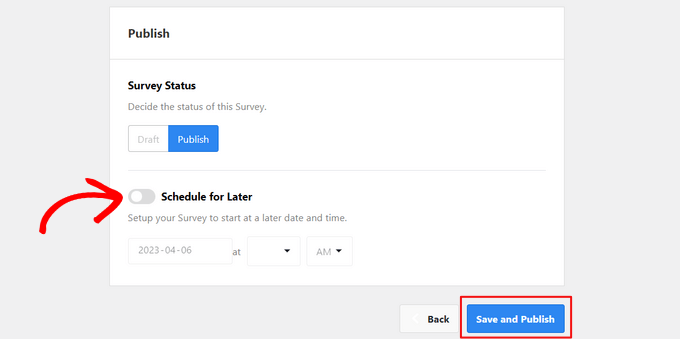
Once finished, simply click the ‘Next Step: Publish’ button.
You can alter the Survey Status from Draft to Publish or set a specific time and date for the survey to be published.
Wrapping Up
Net Promoter Score (NPS) is a powerful tool for measuring client loyalty, helping you enhance your brand image, discover innovative product ideas, and provide superior customer service. This article has illustrated two methods to effortlessly implement an NPS survey in WordPress, giving you the means to elevate your business. Whether you choose the WPForms plugin or opt for UserFeedback, these strategies enable you to gather valuable feedback, compute your NPS score, and take actionable steps to improve your products and services. By leveraging NPS, you can transform detractors into brand advocates and steer your business towards sustained success.
