Do you have no idea where to begin when it comes to web development? Don’t be concerned. WordPress.com allows you to create your own website for free.
Considering the price of web hosting and domain names, creating a website might appear to be a difficult process. Perhaps you’d want to establish your own personal blog to share your thoughts and emotions. Perhaps you’ve launched a new business and want a personalized website that accurately portrays the brand.
You don’t have to worry about purchasing pricey hosting or paying a web professional to construct the website for you when you use WordPress. You may also create your own website for free using WordPress. Here’s how to use WordPress.com to create a free website.
1. Register for a Free WordPress Account
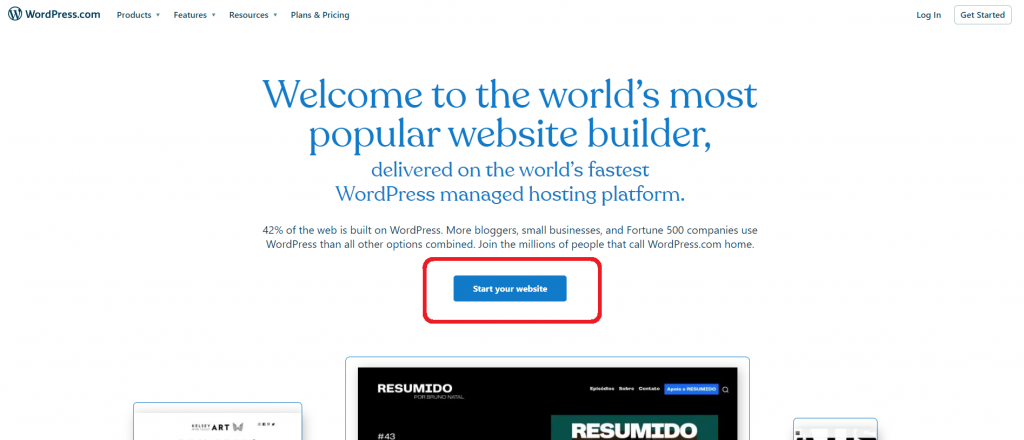
Before you can start building the website, picking a name, and all that jazz, you’ll need to create an account with WordPress. To begin, go to wordpress.com and select Start your website.
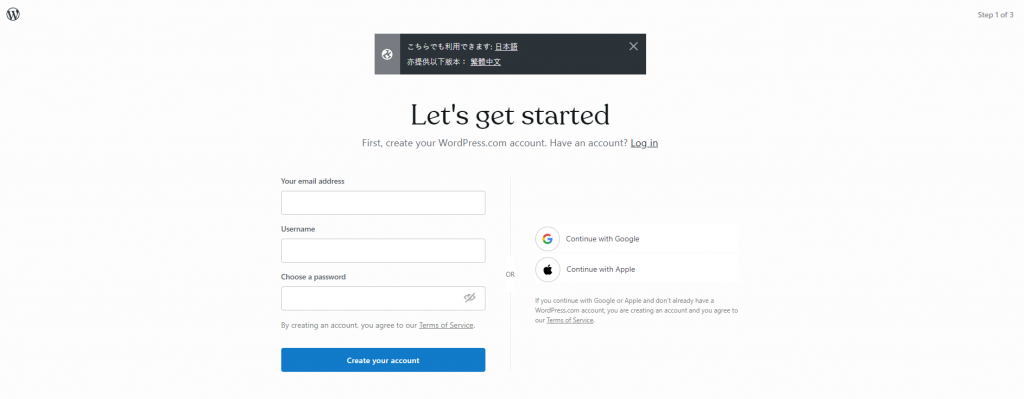
If you don’t already have an account, WordPress will ask you to create one. You may either individually input your registration information or sign up with your Google or Apple account.
2. Pick a Domain Name
After you’ve created your account, you’ll need to pick a domain name. A domain name is a one-of-a-kind identifier that guides people to your website. For example, “google.com” is the domain name in www.google.com.
WordPress suggests that you use a “short and memorable” domain name for your website. A short and memorable domain name is easier to remember and hence draws a larger audience. On the other side, it goes without saying that lengthy domain names like “thisismypersonalwordpresswebsite” should be avoided. It’s difficult to remember, not to mention hardly readable.
When you’re finished with the domain name, type it into the relevant text area to see if it’s available.
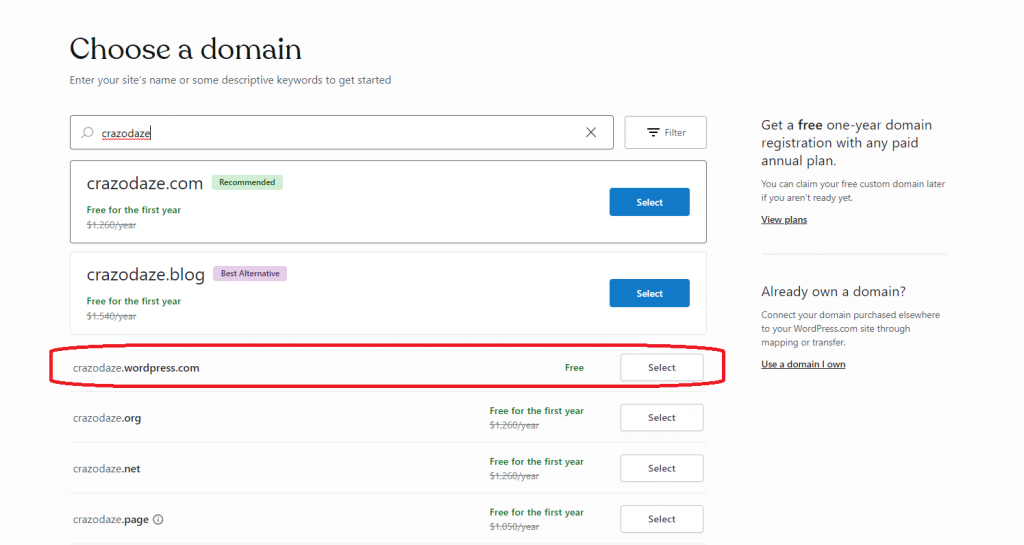
It should be noted that WordPress provides free domain names for the first year, but only if you acquire the yearly WordPress membership. Make certain that you only choose the free *.wordpress.com subdomain plan.
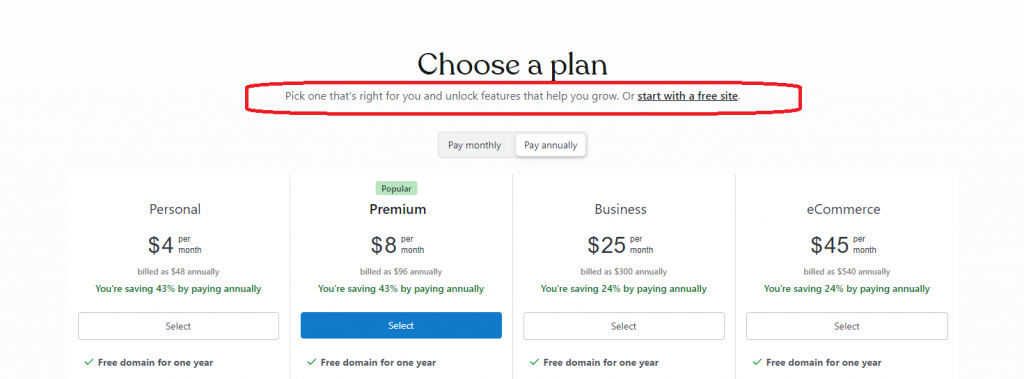
Unless you are serious about building a website with your own unique domain, you may choose a plan that matches your needs. Remember that with yearly subscriptions, WordPress provides a free domain name for a year.
3. Choose Design and Configure the Website
Following a quick “Building your website” loading page, you will be prompted to choose a design for your website. You have the option of starting with a blank page (Blank Canvas) or using one of the free themes available. You can also choose to ignore the site design process if you prefer.
We’ll be utilising the Hever theme for the duration of this guide (Default Theme).
Your website will not be accessible to the general public for the time being. When visitors access your website, they will see a “Coming soon” page. You can, however, see the website with the theme that has been applied on your device.
After that, you’ll be routed to the WordPress dashboard, where the majority of the miracle will take place. To finish the basic setup, WordPress provides a simple “checklist” that you may follow.
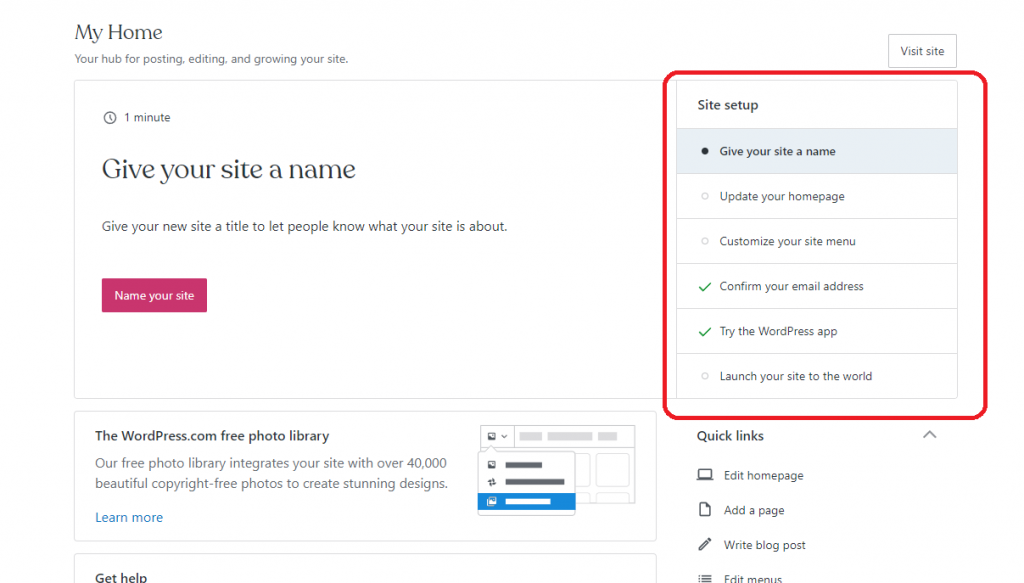
Set up the Site Identity
To begin, hit the button labelled “Name your site.” Insert the name of your website and the tagline here.
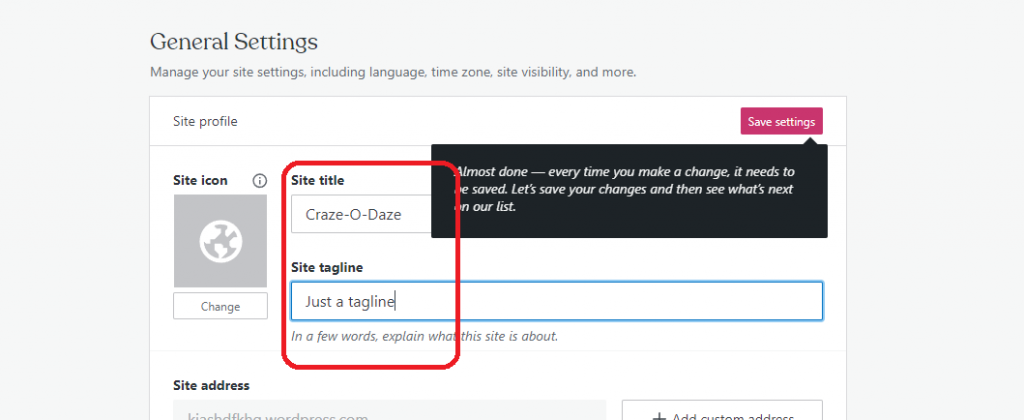
You may also alter the time zone, adjust the footer credits, and make your website publicly available. To save the changes, go to the top and click the Save settings button.
Configure the Homepage
Return to the dashboard and select the Edit Homepage option. WordPress offers an interactive tour to help users become acquainted with the interface; however, it is optional.
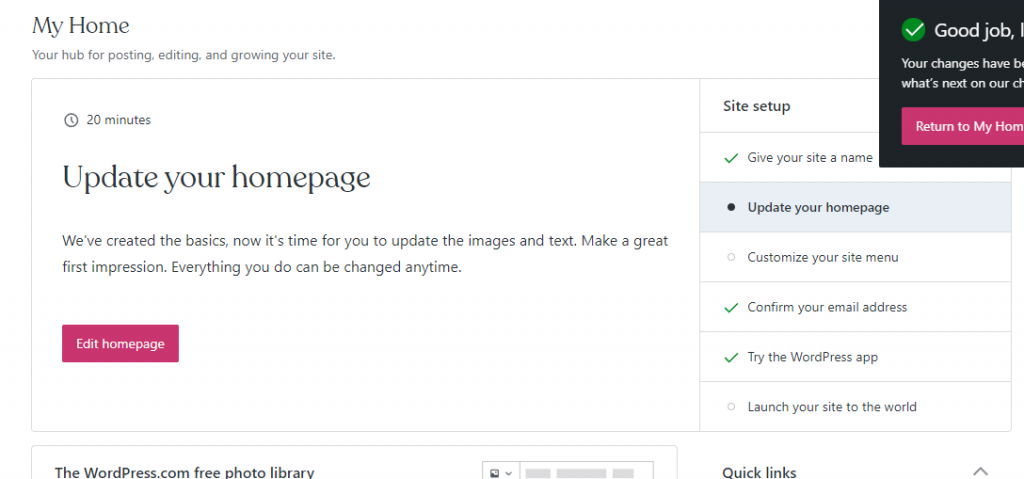
WordPress’s default editor makes use of blocks to display elements. To modify the look of a web page, you may add and delete blocks.
Simply click on an existing block to change it. To alter the biggest heading on a web page, for example, click on it to bring up the edit cursor.
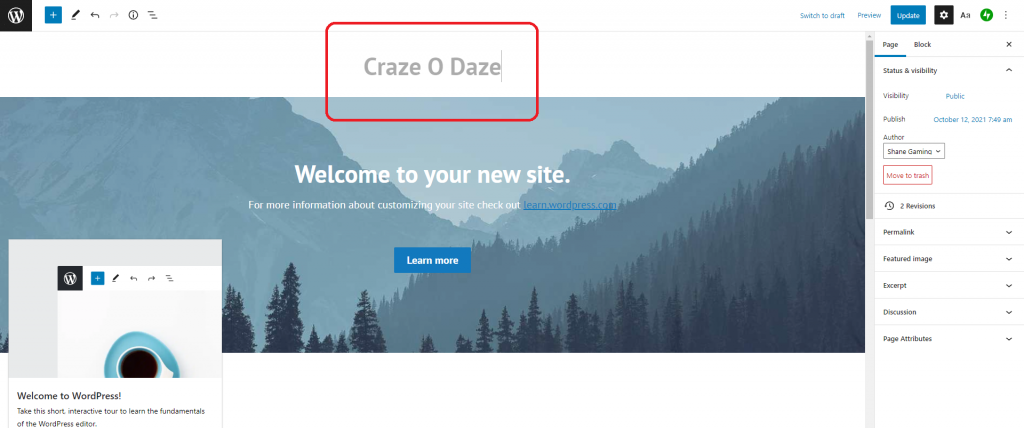
Similarly, you may customise the website by editing all of the other components.
In addition, if you want to add a new element to the web page, click the Add button in the top-left corner of the screen. Then, choose the block you wish to add and drag it to the desired location.

To add an extra button, for instance, click the Add option, choose Button from the list, then drag-and-drop it to the proper position on the page.
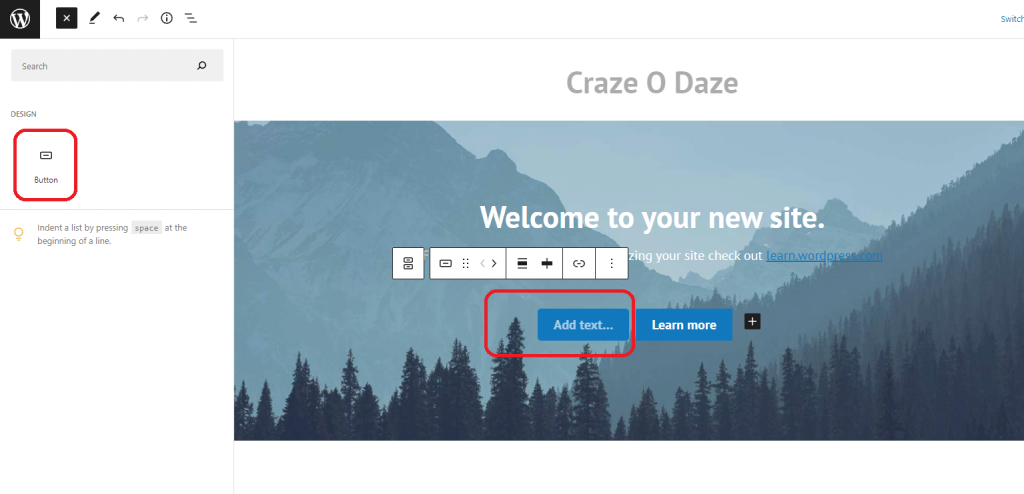
To further modify a block, click on it and then select the Block tab from the right sidebar. You’ll be able to adjust the dimensions, modify the font, colour, and more. Go to the Page tab to change page-level information. You may change the featured picture, modify the Link, add an excerpt, and so on.
When you’re finished changing the homepage, hit the Update button in the top-right corner to exit the editor. You can also Preview the web page to see how it will look on the live website.
From the dashboard, you may create new pages. Select Add new page from the Pages menu in the left sidebar. The procedures for customising the web page are identical to those for customising the homepage.

If you wish to start a blog, you may upload entries to your website and show them on the homepage. There are also a number of blog themes available to help you with the process of setting up your website.
4. Create a Site Menu
If you intend to build a website with numerous pages, you must include a navigation menu. Return to the dashboard and click the Add a menu button.
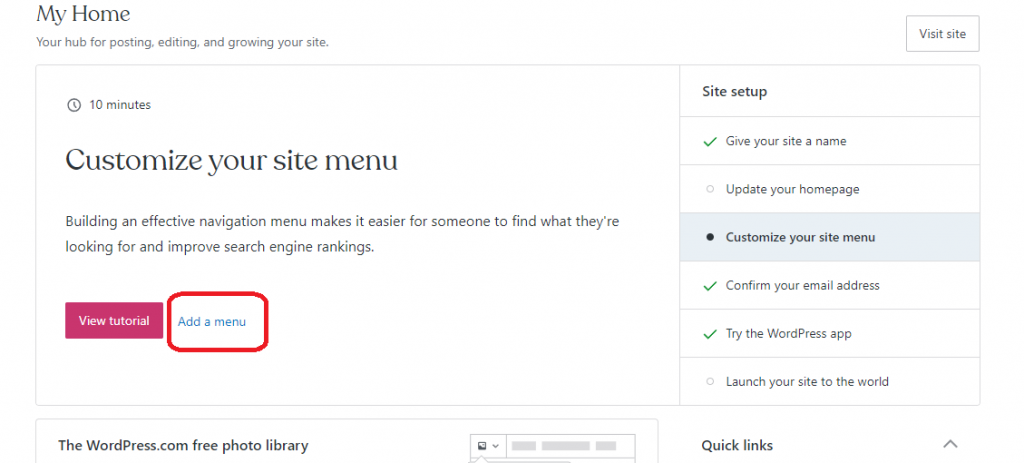
You’ll be sent to the WordPress Customizer, where you may make changes to various parts of the website. Select Menus from the left sidebar and then select Primary. The default items can be removed by right-clicking on them and selecting Remove.
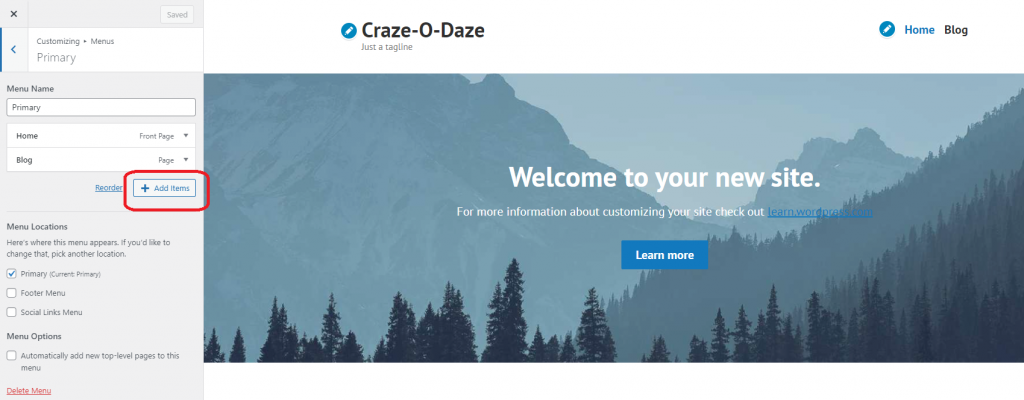
To create new links, click Add Items and navigate to the page you wish to include in the menu. Make sure you’ve already generated the web page you wish to display in the menu.
Select Primary from the list of Menu places to display the menu in the page top.
Once finished, click Save Changes to proceed.
5. Finally Launching the Website
The final stage is to launch the website and make it accessible to the general audience. To do so, pick the General option from the left sidebar and then click on the Settings option. Simply click the Launch site button.
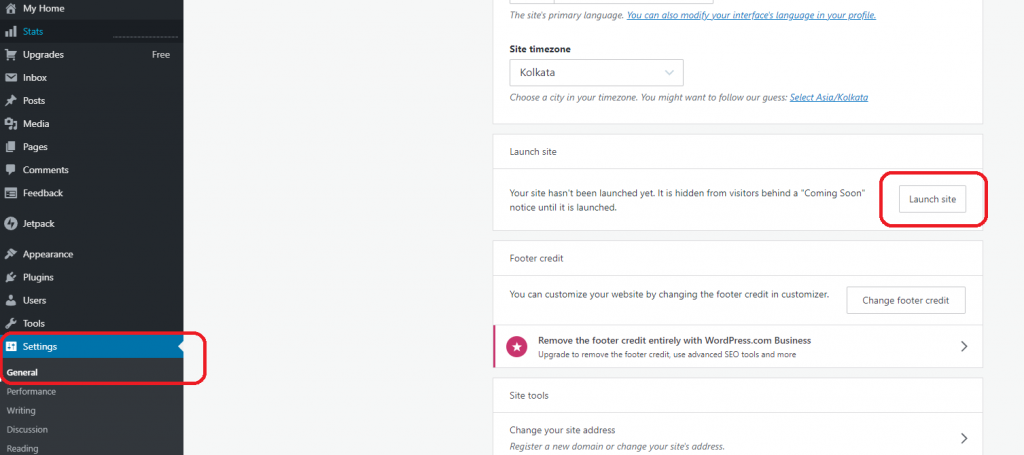
WordPress will prompt you to choose a domain name for your website once more. To continue using the WordPress free subdomain address, scroll down and select the Skip purchase option. Then, to proceed, choose the start with a free site option once more.

To view your website, type its URL into a browser.
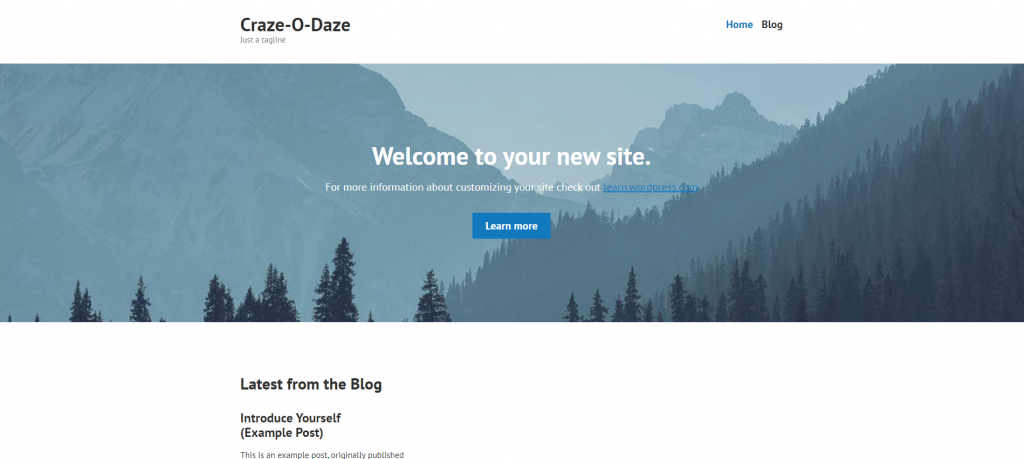
Kudos! You have officially created your own website with WordPress.com.
