Do you want to use a responsive slider on your WordPress website?
Sliders are often placed on the homepage of business or portfolio websites. They allow you to showcase your top-selling products and relevant content to your audience.
Using Slider Factory Pro, we’ll show you how to easily add a WordPress slider, so you can add fast, responsive, beautiful sliders to your website.
Why Use slider Factory Pro as Your WordPress Slider?
Slider Factory Pro is a fully-featured WordPress slider plugin that’s very easy to use. Below are some reasons to choose slider Factory over other plugins:
- Slider Factory Pro adheres to WordPress coding standards and best practices.
- It is WordPress SEO friendly because you can add alt text and captions to all slides.
- Using drag-and-drop slide sorting makes it easy to use. Responsive WordPress slider with touch swipe support for touch-enabled devices like smartphones and tablets.
- The best WordPress Slider plugin to add automatic slide shows to your website with multiple layout options.
- Slider Factory Pro offers everything you need, including a responsive design, predefined design presets, autoplay slide show, touch-swipe, drag slides, slide navigation, slide titles, and descriptions, links on slides, transitions and animations, and custom width and height.
Here’s how you can use Slider Factory Pro to create a WordPress slider.
Creating a WordPress Slider with Slider Factory Pro
First, you will need a slider Factory Pro account, as it is a premium WordPress plugin.
After you log into your account, you will see the plugin zip downloadable link, under Active Resources; click on that link to download the slider factory pro plugin.
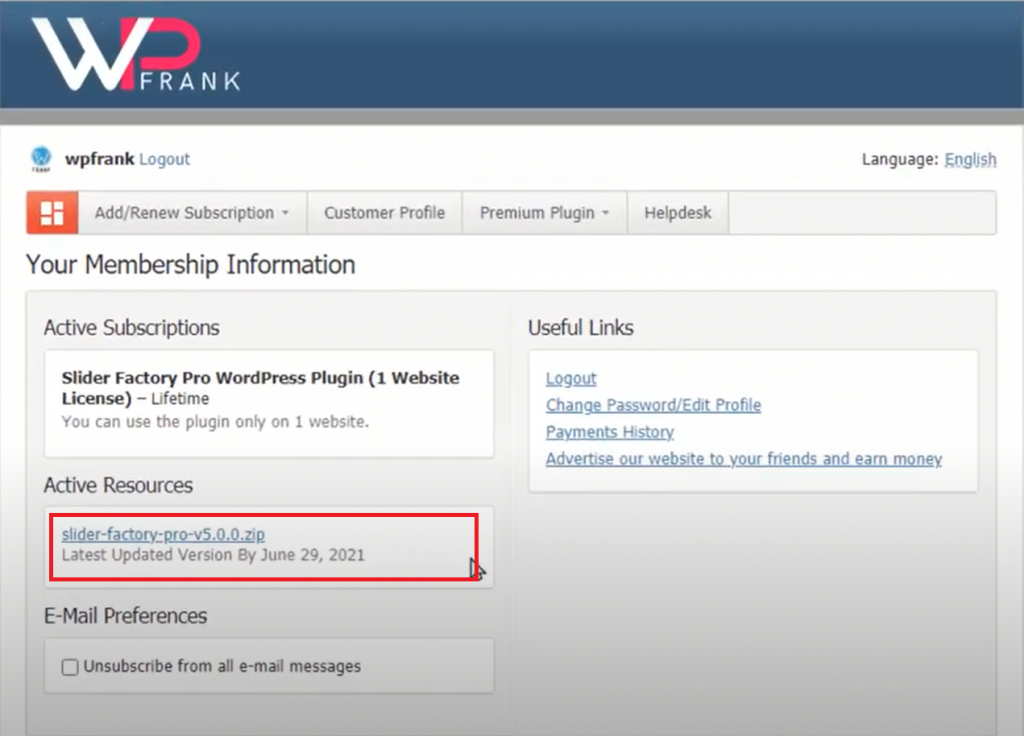
After downloading the plugin zip file, we will upload, and install the plugin, on the website. Go to the Plugins menu page, and click on the add new submenu page. Click on the “Upload Plugin” button, then click on the “choose file” button, and select the downloaded plugin zip file and click on the open button. Now, click on the “Install Now”, button to install the plugin. After, plugin successful installation, click on the “Active Plugin” button, to activate the plugin.
The slider factory pro plugin has been installed on the website.
Now you can add a responsive slider to your WordPress website. Go to the Slider Factory Pro plugin menu page.
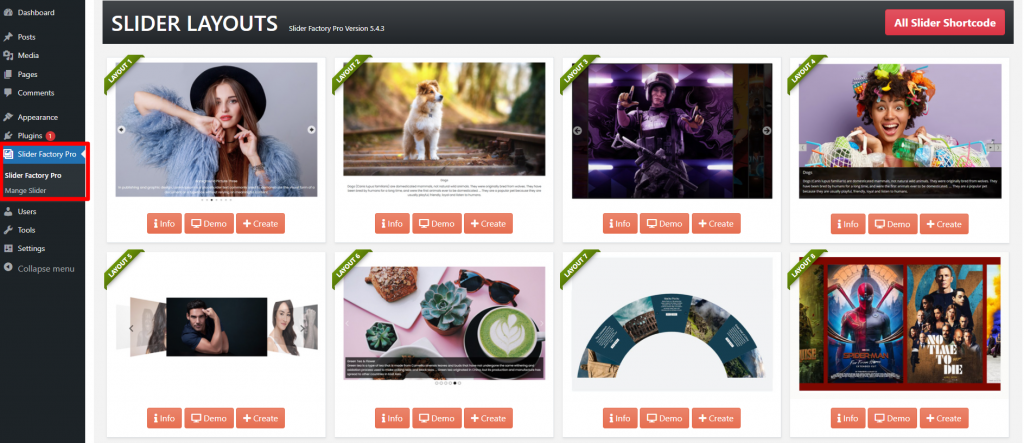
On that page, you will see 21 different slider layout banners, which means you can create 21 different design layout style sliders. Let’s create a slider using layout 1.
Click on the “Create” button under the slider banner layout one.

Upon clicking the button, you will be redirected to the slider creation panel, where you can specify the title for the slider, upload the image slides and configure the slider settings.
Firstly, we will name the slider we will be creating.
The slider can be named or titled by clicking in the input box under the Slider Title heading.

Next, click on the “+ Add New Image Slides” button to upload the images.
We recommend using the same-sized images for the best results.

The WordPress Media Library panel will open after clicking that button, where you can upload new images or select images previously uploaded. By holding the Control Key (CTRL) on the keyboard, you can select multiple images. To select the images for the slider, click the “Select” button.
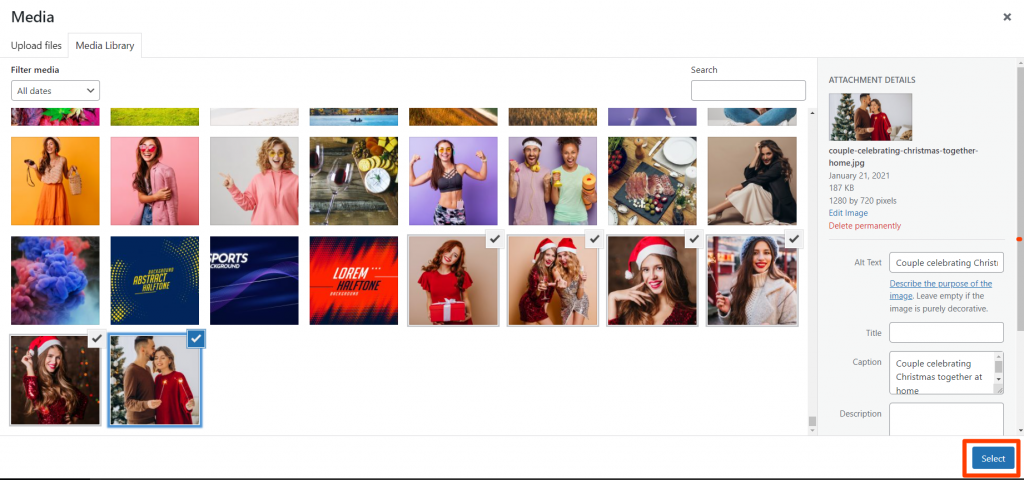
By clicking on the select button, all the selected images for the slide will appear under the button.
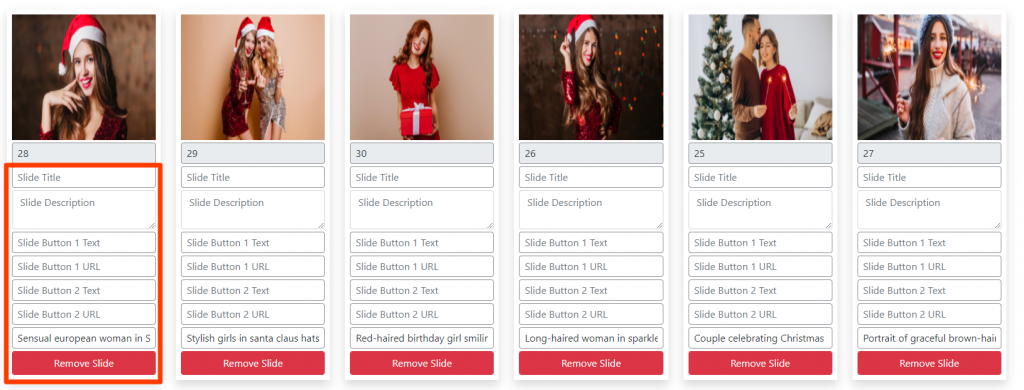
Each slide can have a Slide Title, Slide Description, two Buttons with their URL, and Slide Alt Text. The search engines use the slide alt text to optimize the search results.
To do this, we will configure the slider settings as follows:
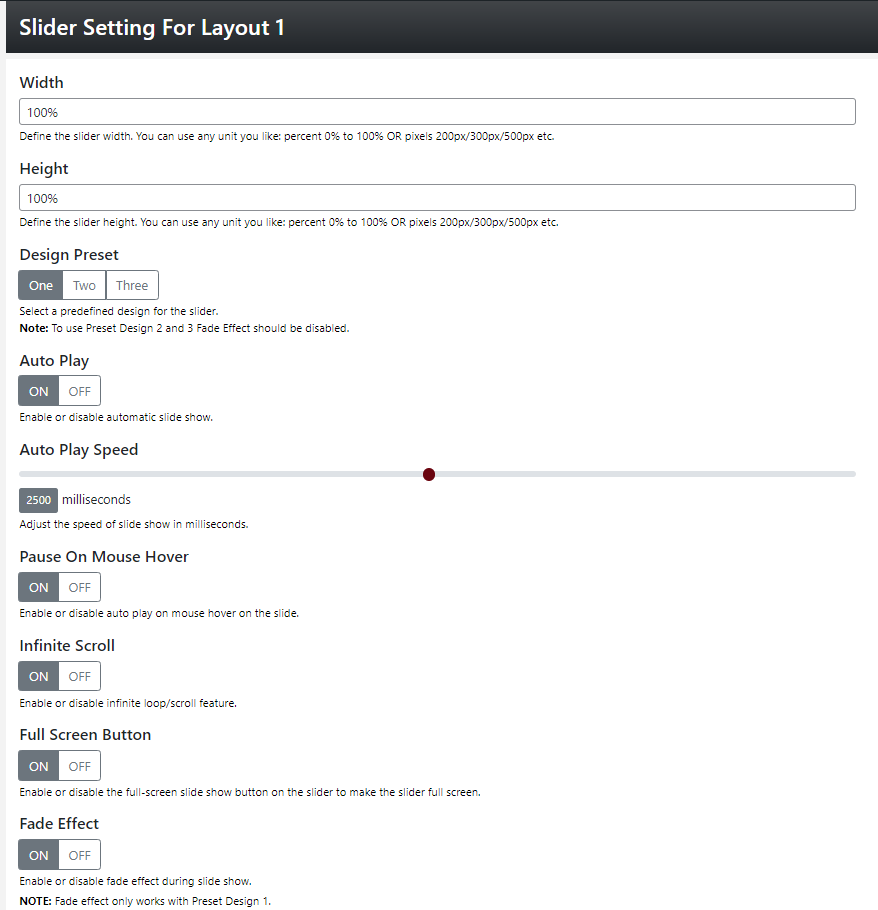
The Width setting determines the width of the slider body. By default, this setting is set to 100%. If you need to change it, you can do that here.
The Height setting determines the height of the slider body. 100% is the recommended value for this setting.
AutoPlay sets the automatic slide show functionality for the slider.
AutoPlay Speed sets the automatic slide show functionality for the slider.
Enable or disable autoplay Pause On Mouse Hover on the slide.
Enable or Disable Infinite Scroll/loop features.
To make the slider full screen, enable or disable the Full-Screen Button.
Slide show Fade effect can be enabled or disabled for design preset 1 only.
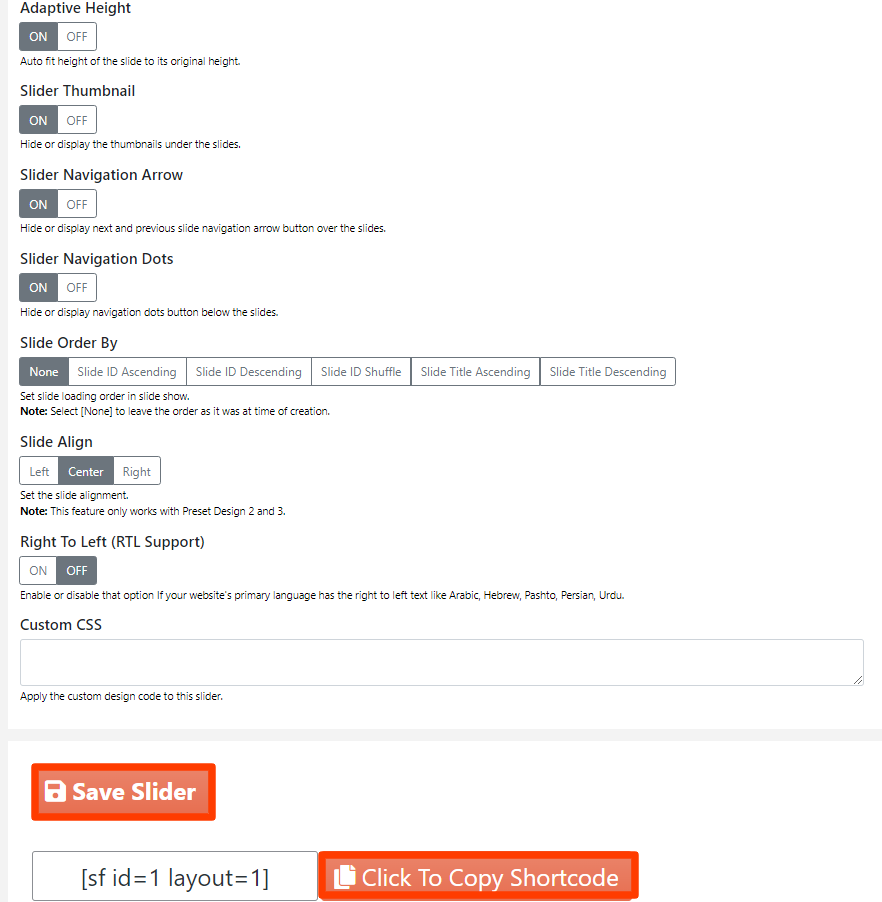
Automatically adjust the height of the slide to its original height by enabling Adaptive Height.
By using the Thumbnail slider On/Off, you can hide or display the thumbnails under the slides.
Hide or display the next and previous slide Navigation Arrows over the slides.
Hide or display the Navigation Dots button below the slides.
Slide Order By determines the order of slides in the slide show. Three options are available: None, Slide ID Ascending, and Slide ID Descending. None sets the order of the slides in the slider. Slide ID Ascending sets order according to slide ID increasing order. Choosing Slide ID Descending will set the order according to slide id decreasing order.
Set the slide alignment. This feature only works with Preset Design 2 and 3.
Enable or disable Right To Left (RTL Support) If your website’s primary language has the right to left text like Arabic, Hebrew, Pashto, Persian, Urdu.
Adding Custom CSS to this slider is the best feature for developers.
Create the slider and generate the slider shortcode by clicking on the Save Slider button. To copy the generated shortcode, click on the Click To Copy Shortcode button.
Create a slider and publish it on the page
Before creating the slider, we copied the shortcode. Let’s display the slider now.
Go to Pages > Add New. Paste the copied shortcode into the shortcode box and type the page title. Click the Publish button to save the page.
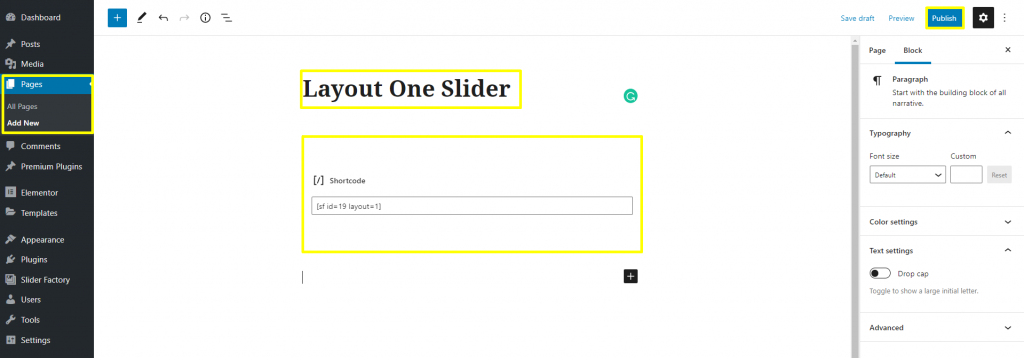
Click here to view the slider preview.

Editing and Updating a WordPress Slider with Slider Factory Pro
Creating a WordPress slider with slider factory pro has the advantage of allowing you to edit your slider without editing the post or page where you have inserted it.
In the slider factory pro dashboard, click on the All Slider Shortcode button.

The table will appear, By clicking on the ‘Edit’ icon, you can edit the slider.

It’s time to change the slider you created earlier. Make whatever changes you want to your slider. then click on the Update Slider button. That’s it, the slider has been updated.
Simply paste the shortcode for the slider into your post, page, or widget to add the slider.
We hope you found this article useful in learning how to create a responsive WordPress slider using slider factory pro. Check out our guide on Create Animated Gif Slider On Your WordPress Website homepage and also check out How To Create A Responsive Image Slider.