What is Amazon Lightsail?
Amazon Lightsail is a fully managed web service offered by Amazon Web Services (AWS) that makes it easy to set up, secure, and scale web applications and websites. It is designed for developers and small businesses who need a simple and cost-effective way to host their applications and websites.
Lightsail includes everything you need to launch your project quickly, including a virtual private server (VPS), a managed database, and a static IP address. It also offers a variety of pre-configured environments for common web development stacks, such as WordPress, Magento, and LAMP. Additionally, Lightsail offers a variety of add-on services, such as load balancers, databases, and email, that can be easily integrated with your application.
Lightsail also provides a simple and intuitive web-based management console that makes it easy to manage your applications and resources. This includes features such as automatic backups, monitoring, and alerts, as well as the ability to scale your resources up or down as needed.
Additionally, Lightsail provides a feature called “Blueprints” which are preconfigured environments with popular web applications like WordPress,Joomla,Drupal,Magento and many more. You can quickly and easily deploy these preconfigured environments to your Lightsail instances.
In summary, Amazon Lightsail is a fully managed web service that provides a simple and cost-effective way to host web applications and websites. It offers a variety of pre-configured environments, add-on services, and a simple web-based management console to make it easy to manage your applications and resources.
Installing WordPress on Amazon Lightsail
Here’s a high-level overview of how to install WordPress on Amazon Lightsail; continue reading for further instructions:
1. Creating a new instance
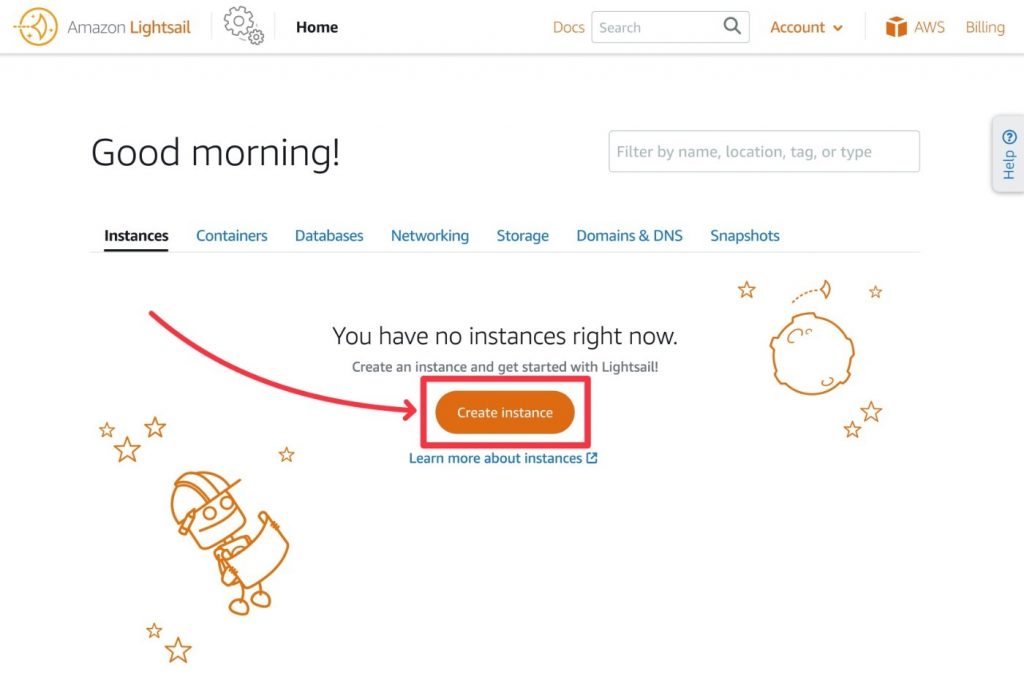
Log in to the Amazon Lightsail dashboard to get started. If this is your first time using AWS, you may need to establish an account before accessing the dashboard. Click the button to create a new instance once you’re in the Amazon Lightsail dashboard:
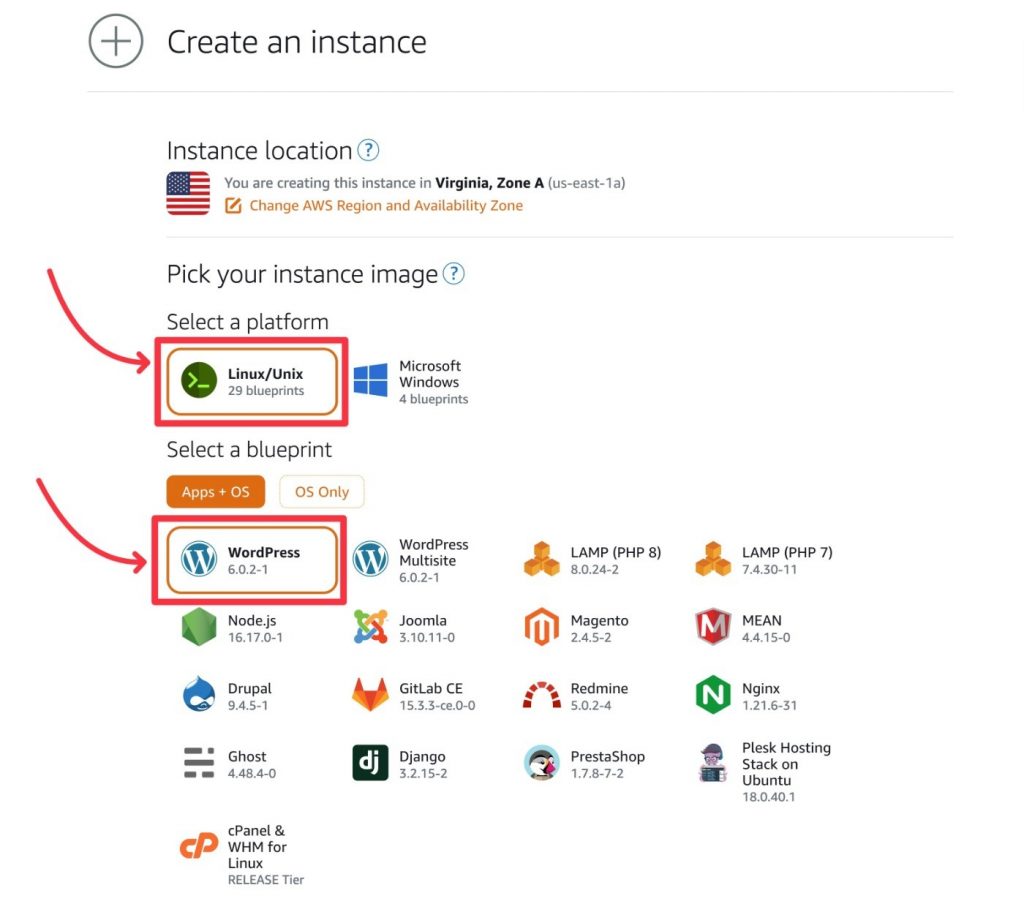
On the next page, pick Linux/Unix as the platform, followed by the WordPress blueprint (both of these should be selected by default).
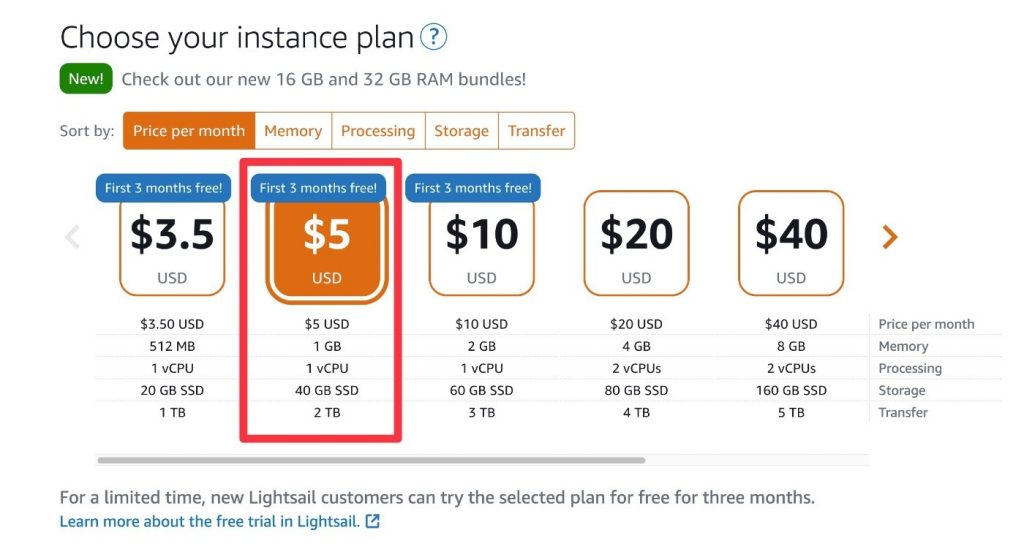
You may select your instance plan further down the page, which affects the resources and pricing of your server. While you are free to pick any package, for most WordPress sites, we recommend the $5 instance, which includes 1 GB of RAM and 1 vCPU. This plan should be able to accommodate hundreds of thousands of visitors each month if you use caching and don’t have a lot of dynamic content.
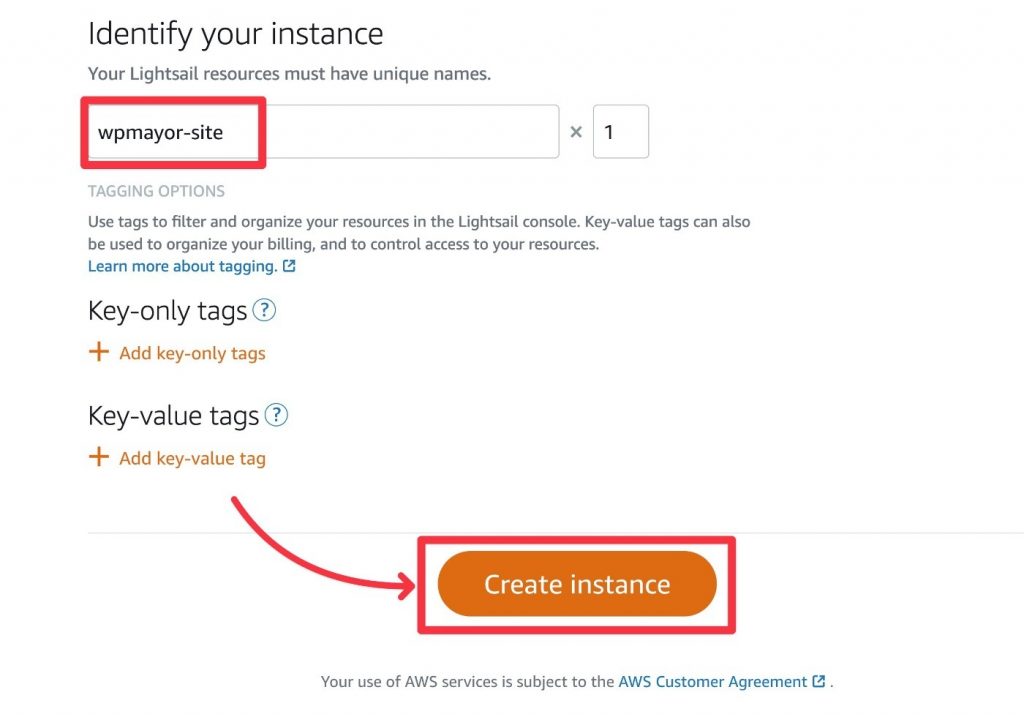
Below that, you may give your instance a name to make it easier to remember. After making your selections, click the Create Instance button at the bottom to start your instance.
You’ll now have to wait a few moments as Amazon Lightsail creates your instance. When it’s completed, the instance should appear in your AWS Lightsail dashboard:
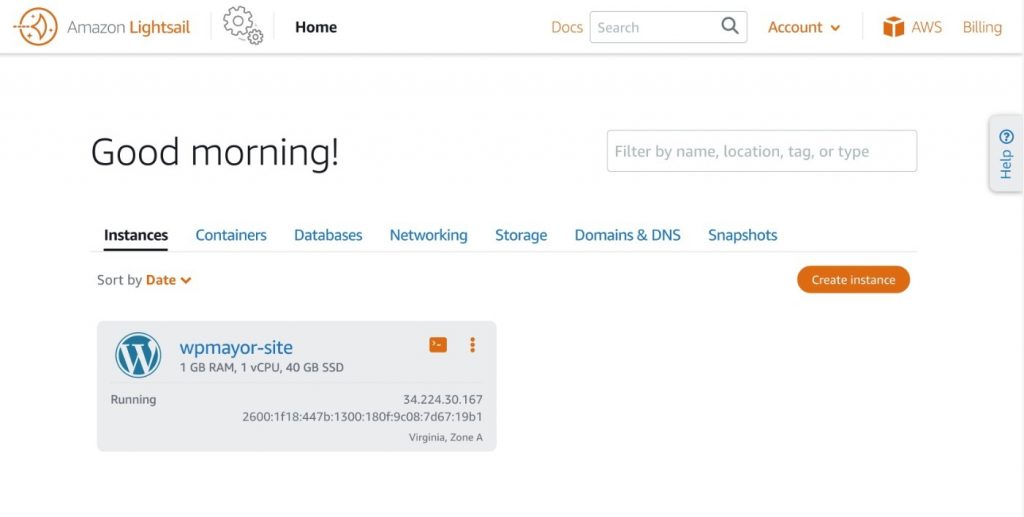
Click on the instance name to access the dashboard for only this instance.
2. Access Your WordPress Login Information
A fully functional WordPress website has now been created for you. You may get there by copying the Public IP address into your browser’s address bar:

However, because you do not yet have your WordPress username and password, you are unable to log in to your site.
Your WordPress site’s username will be used by default. However, in order to obtain the password, you must utilize the command line. But don’t be concerned! It’s really simple and does not necessitate the installation of any new software.
To begin, launch the browser-based SSH client for your instance by choosing the Connect using SSH option on your instance dashboard:
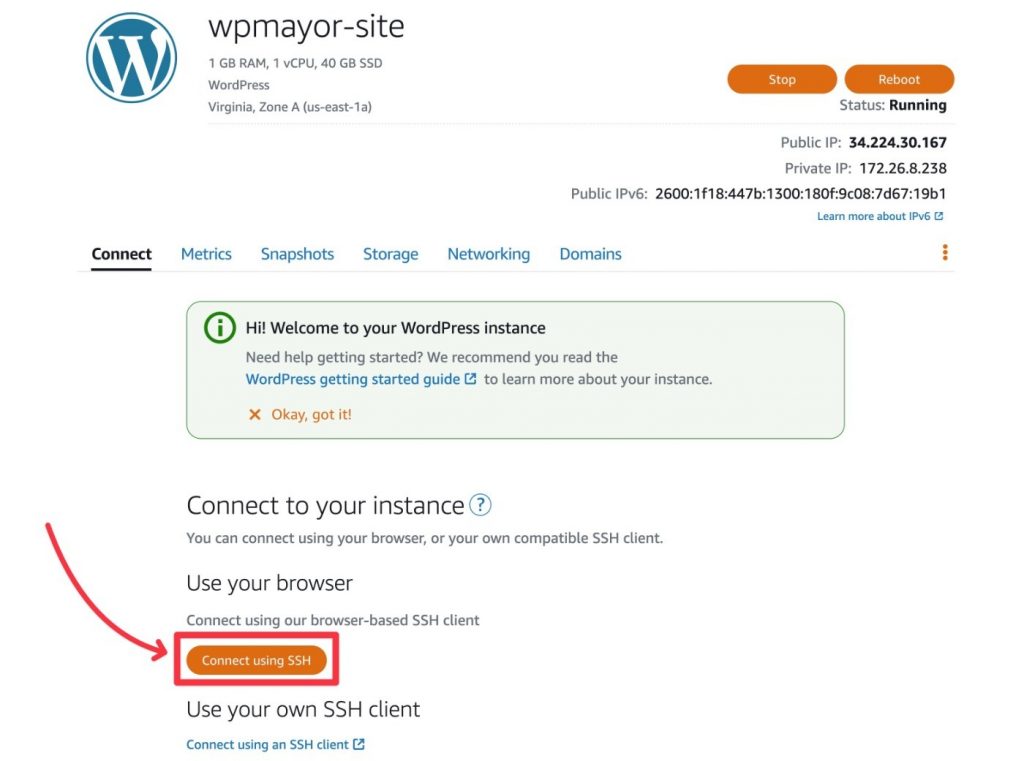
This will launch a command line interface in your browser that you may interact with. There is no need to log in or authenticate – everything is ready to use. To access your WordPress user password, simply enter the following command and press enter.
cat bitnami_application_password
You should then see your password appear; copy it and keep it somewhere safe so you can use it to log in:
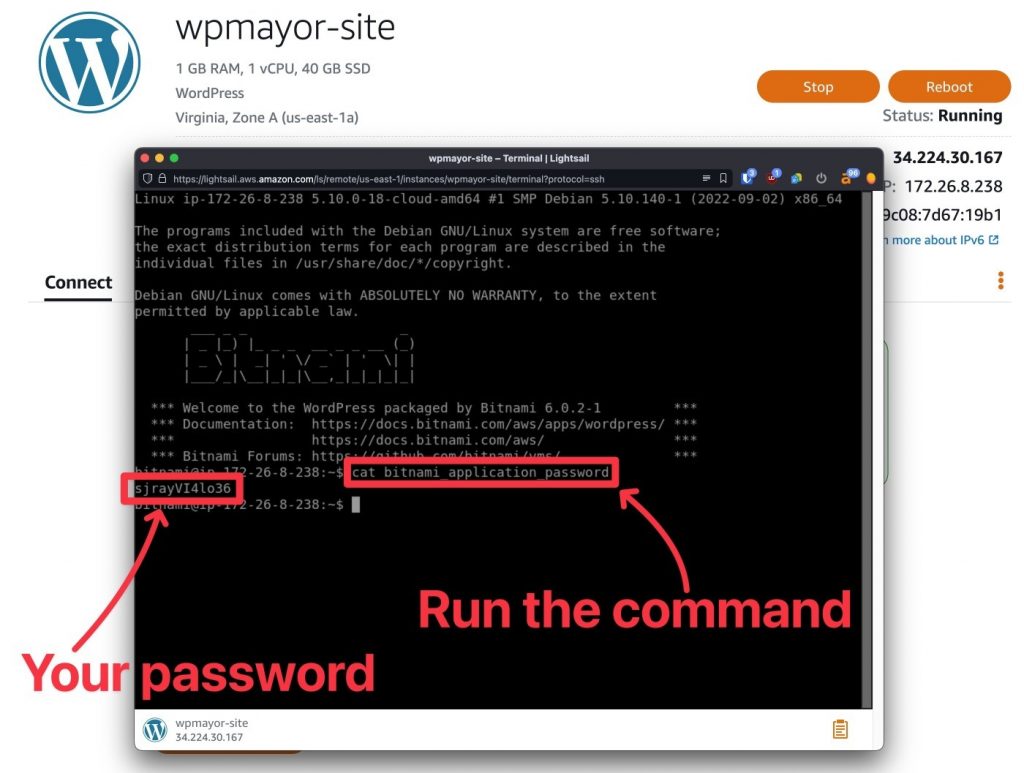
You may now log in to your WordPress installation using the following credentials:
- Username: user
- Password: from the terminal window above
3. Add a Static IP Address to Your WordPress Installation
While you can currently visit your WordPress site using your instance’s public IP address, you cannot rely on it indefinitely. That’s because, with your instance’s present configuration, the public IP address will change each time you stop/start it.
If you assigned your domain name to this public IP address, the domain connection would cease to function if you restarted your instance. To remedy this, Amazon Lightsail provides a free static IP address for your instance.
Once you’ve assigned a static IP address to your instance, it will always have the same IP address. Go to the Networking tab on your instance’s dashboard to get started. Then, choose the option Attach static IP:
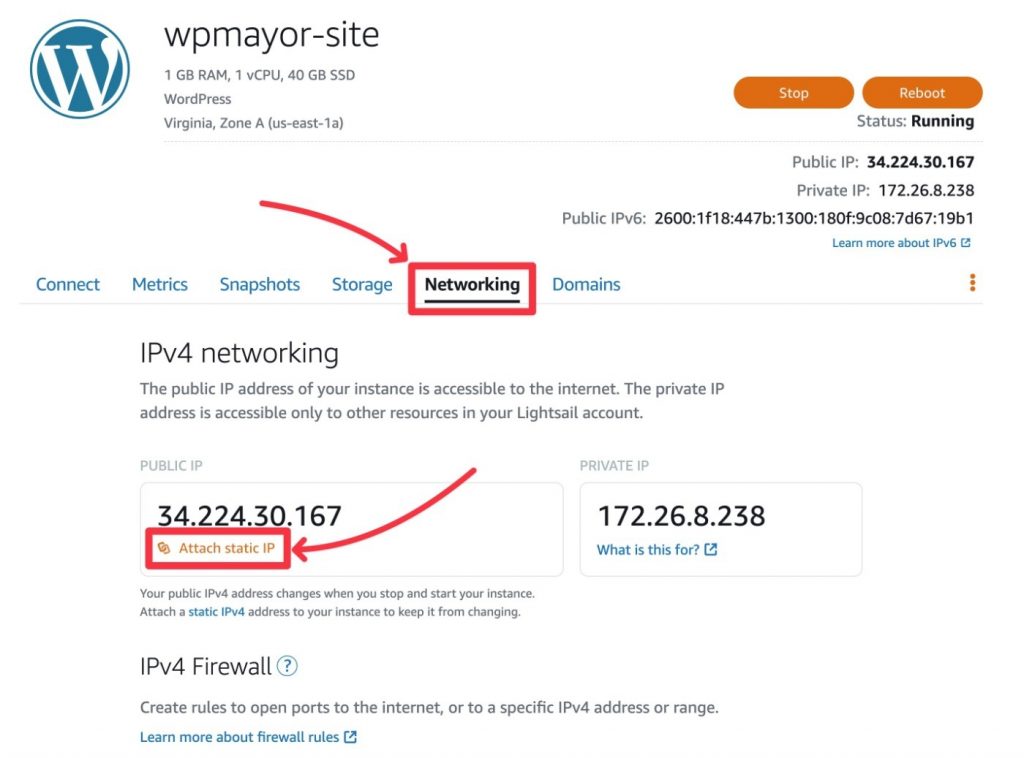
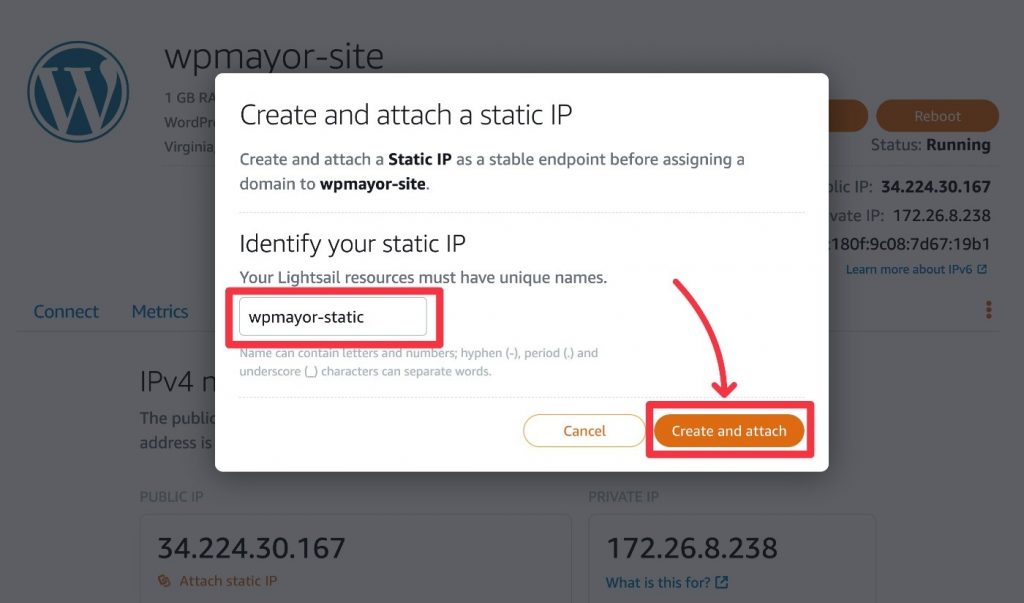
This will cause a popup to appear. After giving your static IP address a name, click the Create and attach button:
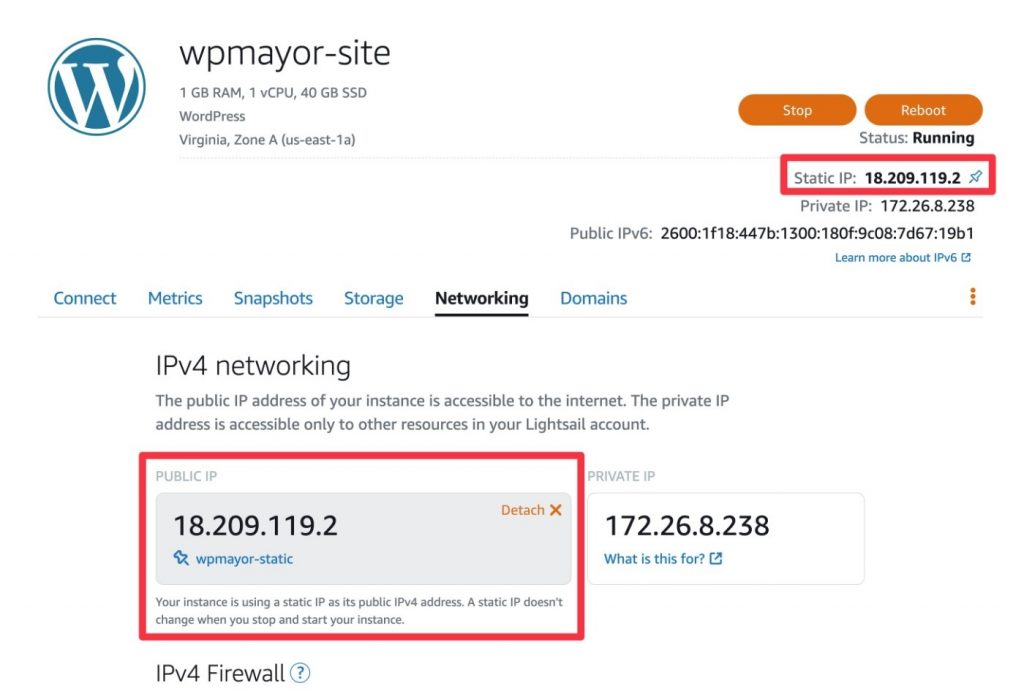
Your instance now has a new, static IP address. This should be represented on the instance dashboard’s Networking page, as well as the information summary in the top-right corner.
4. Configure Your Domain Name to Use a Static IP Address
Now that you’ve assigned your instance a static IP address, you may direct your domain name to it. This allows you to visit your WordPress site by simply inputting the domain name rather than the IP address.
You’ll need to work from wherever you control your domain’s DNS records to set this up. This is usually your domain registrar. Alternatively, if you’re using Cloudflare, you’ll manage these records from your Cloudflare dashboard.
You may alternatively transfer DNS administration to Lightsail and manage DNS records using the Lightsail panel, albeit this involves a few more steps. The simplest way is to add the following entries to wherever you maintain your domain’s DNS records:
| Record Type | Content | Value |
| A | @ | [staic Ip Address] |
| CNAME | www | yoursite.com |
This implies you’d like to use yoursite.com rather than www.yoursite.com.
Here’s how it appears on Cloudflare:

You may now log in to your WordPress instance by providing your domain name:

The right domain name should be detected automatically by your WordPress site. To double-check, click on Settings General and make sure your domain name appears as the WordPress Address and Site Address.
5. Install Your SSL Certificate
You now have a functional WordPress website that can be accessed via your domain name. The final step is to install an SSL certificate so that your site can take use of HTTPS.
Amazon Lightsail and Bitnami deploy the basic tools required to set up a free SSL certificate via Let’s Encrypt as part of the WordPress blueprint. To enable the SSL certificate, however, you must perform a few instructions in the browser’s terminal window.
Return to your instance dashboard and click the Connect using SSH option to launch the in-browser terminal window. After that, execute the following command:
sudo /opt/bitnami/bncert-toolYou may be prompted to update bncert. If you do, simply enter Y. Then, repeat the preceding instruction. Now, separate the non-www and www variants of your domain name with a space and press enter. Here’s an illustration:
yoursite.com www.yoursite.com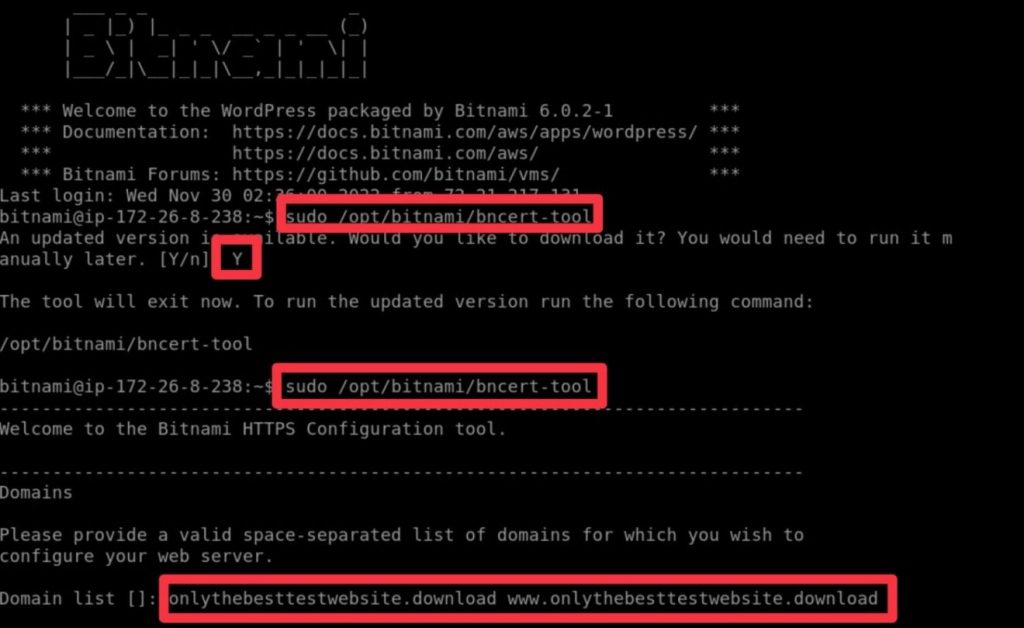
After that, you’ll be prompted to activate HTTP to HTTPS redirection. Enter Y to enable it, then press enter. You may then configure a non-www to www redirection or the opposite. Finally, a summary of your options will appear. If everything appears to be in order, type Y and press enter to complete the setting.
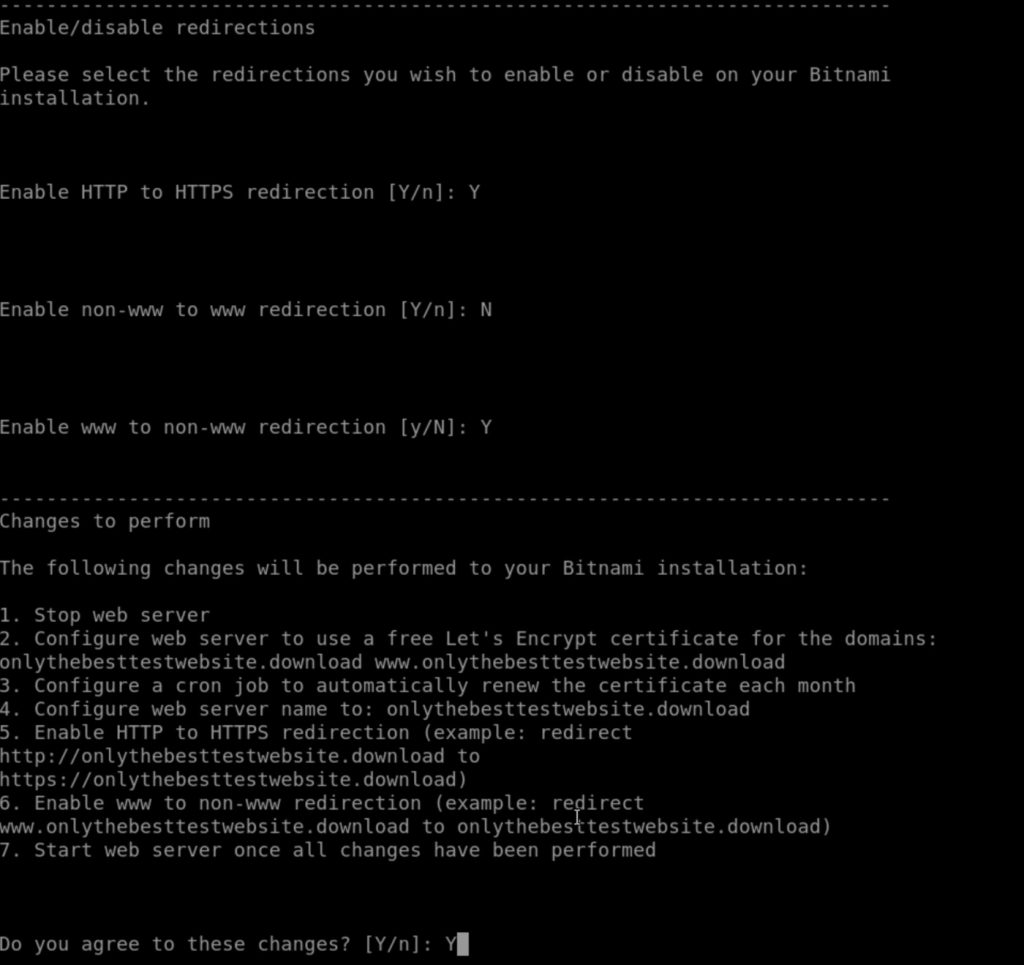
You may be required to input an email address to use with Let’s Encrypt as part of the setup. And there you have it! After Bitnami completes (which should only take a few seconds), you will be able to utilise HTTPS on your site. If you go to your site now, you should see a green padlock.
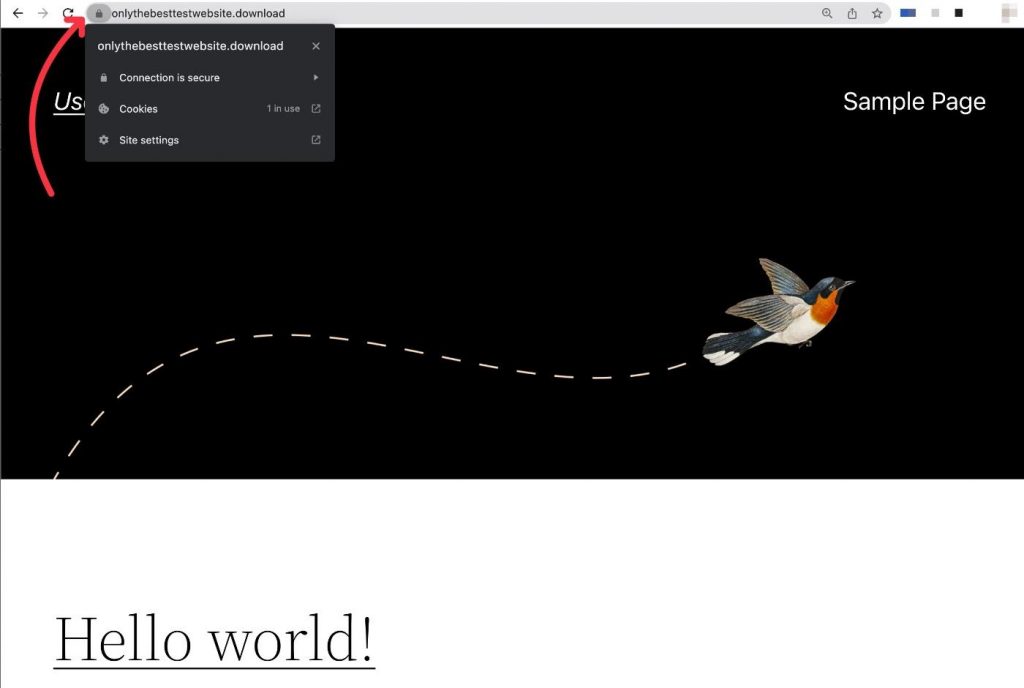
Your website is now live.
Amazon Lightsail may be used to create a WordPress site.
You may quickly launch a WordPress site hosted by Amazon’s cloud network using Amazon Lightsail. The pre-built plans allow you to get up and running in just 15 minutes, with no particular technical skills required.
The Lightsail blueprints can also handle aspects like installing a free SSL certificate from Let’s Encrypt. If you want to give it a go, you can receive your first three months free when you start a new instance. Try it out today, and you’ll be up and running in no time.
